 You will may have read the post removing moiré patterns using GIMP which describes how to remove moiré patterns from images using GIMP. This works well but you major headaches when you have an image that has a mixture of text and images.
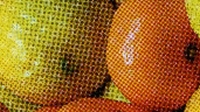
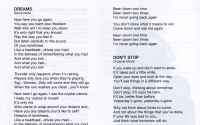
The problem is that if you apply a fourier transformation to text you get the following distortion:

Not very nice. You really need to find a way to apply the fourier transform to the images but leave the text along. This post describes one way of doing this using GIMP. Note I am using GIMP 2.8.0.
| 1. | Open the original image in GIMP and create a copy: |
| 2. | Run the fourier transform over the copy version as described in the post Removing moiré patterns using GIMP. |
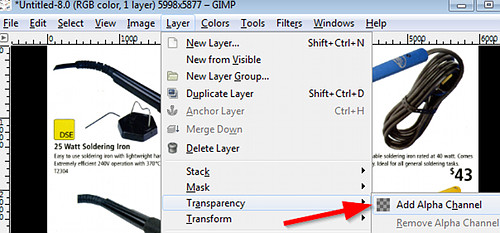
| 3. | On the original select:
Layer | Transparency | Add Alpha Channel |
| 4. | We will work on one image on the page at once. For the image that you want to work on use the magnifying tool to enlarge this image to fill the window so it is easy to cut around. |
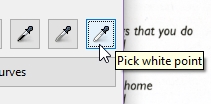
| 5. | Now select the “Free Select” or “Lasso” cutting tool: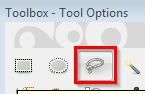 |
| 6. | After you have selected the “Free Select” tool, look at the bottom for the “Tool Options” and ensure you enable “Feather edges”.Then set the “Radius” for the feathered edges. You may need to experiment to find a good feather radius depending on the size of your image – it may need to be quite large if you have a big image.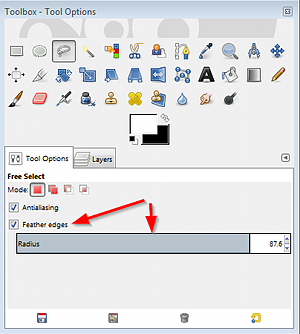 An important thing to remember is the radius of the feathered edge needs to be set before making the selection with the free select tool. If you change this after making the selection it will use the old radius. An important thing to remember is the radius of the feathered edge needs to be set before making the selection with the free select tool. If you change this after making the selection it will use the old radius. |
| 7. | Using the free select tool cut around the first image. Try to give as wide a berth to the image and the text as possible.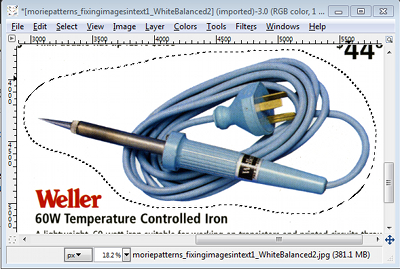 To use this tool press down the left mouse button and drag it around your image. When you release the mouse button it will draw a line from where you started and where you stopped and create the selection. To use this tool press down the left mouse button and drag it around your image. When you release the mouse button it will draw a line from where you started and where you stopped and create the selection. |
| 8. | Then select “Edit | Cut”. If you then select somewhere else it will remove the select to give you: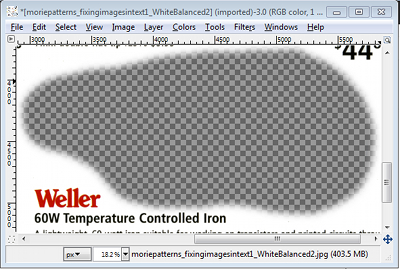 You can now see the blurred or “feathered”, edge around the cut. You can now see the blurred or “feathered”, edge around the cut. |
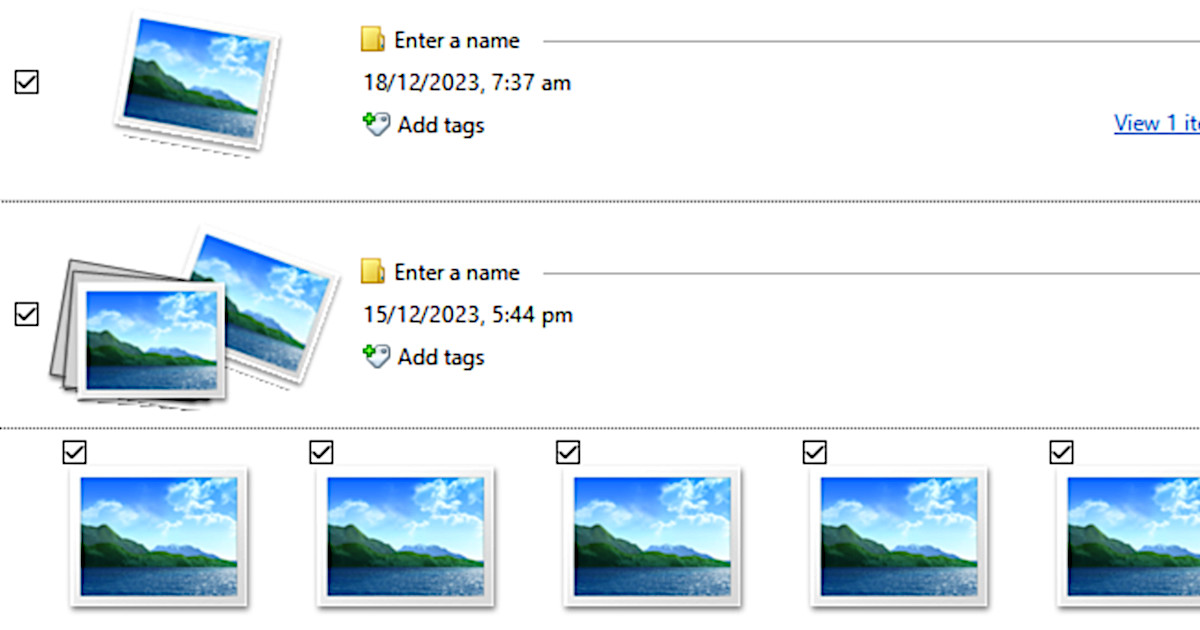
| 9. | Repeat the above steps for all the images and you should get something like: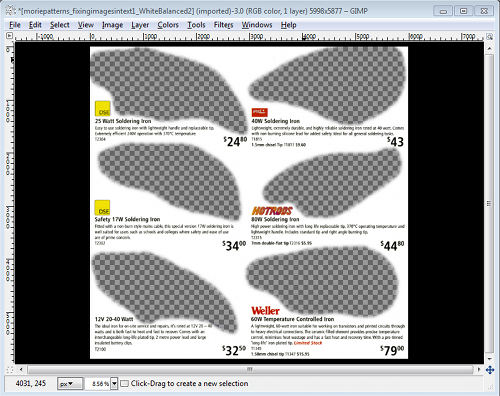 |
| 10. | From the image copy you made at the start select “Edit | Copy” |
| 11. | Go to the original, the one we have just been editing and select
Edit | Paste as | New Layer
|
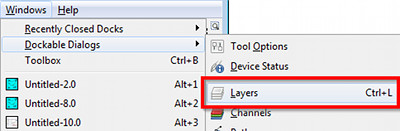
| 12. | You will now find your newly copied, fourier transformed image is on top of the original image. However they are in different layers. You now need to make sure the “Layers” dialog is showing.Select:
Windows | Dockable Dialogs | Layers
|
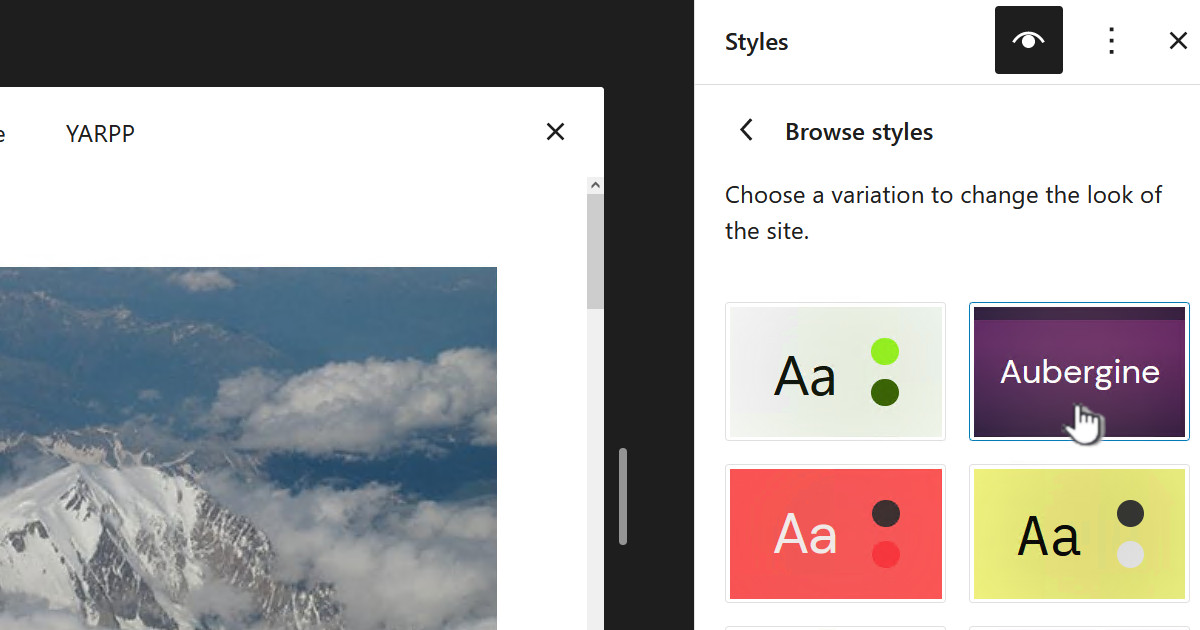
| 13. | The “Layers” dialog should now appear, as shown below on the left. The newly pasted layer will likely show up called “Clipboard” and it will be the top layer. In my case I had changed the color of the layer, so that is why it is blue in color – yours will be a thumbnail of your image. You now need to drag your layer below the other layer – probably called “Pasted Layer”. Do this by dragging the text “Clipboard”: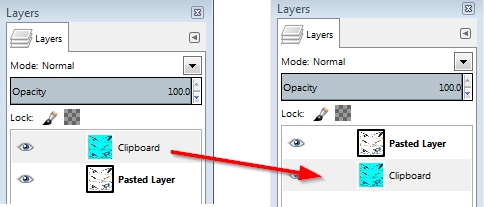 |
| 14. | This should give you the following, again remembering I recolored my fourier transformed image blue. |
| 15. | If you magnify you will see the blurred edge between the two images: |
| 16. | Finally select “Image | Flatten Image” to merge everything together.Hopefully your images aren’t colored blue like mine 😛 |


![[L] – WordPress UAM Locked Post](http://www.zoyinc.com/wp-content/uploads/2024/04/WordpressUAMLockedPost_Featured.jpg)