OMV doesn’t have a backup function which is a problem. Given it is relatively straight forward to setup OMV one option is to simply set it up again. I really don’t want to do that so the only other comprehensive option is to backup the system disk.
The problem is that there isn’t any free, easy, way to backup a Linux system. Yes there is Clonezilla, Rsync and “dd” but they aren’t the simple UI solutions you have with Windows. In fact using dd is actually the simplest and easiest but to ensure you catch everything you really need to backup the full disk and with modern disks running at least 120GB that is a lot of backup space.
In addition the OMV setup does not allow you to setup the partitioning of the system disk – this is done by the install and it uses the full capacity of the disk, apparently regardless of the disk size.
The solution I have arrived at is to basically do an initial install onto a small disk and then clone that to a larger disk.
This is not a tutorial on using VMware so if there is something you don’t know then Google is your friend. I have done this on an ESXi server but it should work just the same on VMware player.
The short version
In summary this is what I do:
- Create a virtual machine on VMware, or any other hypervisor, with a 7GB drive
- Install OMV onto this with little or no customization
- Image this VM disk using Debian Live, “dd” and gzip to a network share
- From the physical OMV server boot with Debian Live.
- Use dd to restore the backed up image from the network share to the physical disk
After the above has been done you will finish with a disk that is mostly empty and partitions with OMV occupying 7GB of space.
From this point on you can backup using dd from the physical disk and you will only be backing up 7GB. Whilst not as small as other options I believe it is manageable given you don’t really need to do this very often and compressed it should drop down quite a bit. If you are really worried about space you can also zero the unused bytes which will make the backup nice and small.
Before you start
You need to ensure the VM is on the network as it will need to connect to the internet to download at least one package.
You need to download the ISO for Open Media Vault http://www.openmediavault.org/ in my case was “openmediavault_2.1_amd64.iso”.
You also need to download the ISO for Debian Live https://www.debian.org/CD/live/ in my case “debian-live-8.5.0-i386-cinnamon-desktop.iso”
Create the VMware Virtual Machine
Create a virtual machine, I selected “Virtual Machine Version 11”, but any recent version is probably fine. Ensure you set the memory to be approximately the same as the physical machine.
With regards to the hard drive, during the creating of a new VM it doesn’t allow you to create a drive using IDE. So when creating the initial VM don’t include a hard disk. After the VM has been created add a hard disk and keep it as small as possible. At the time of writing the minimum disk size was 2GB and my experience was that it created a swap partition of the same size as the RAM.
In my case I was using 4GB of RAM so I created a disk of 7GB so there was a bit of extra wiggle room. We really need the disk to be zeroed so select “Thick Provision Eager Zeroed”:
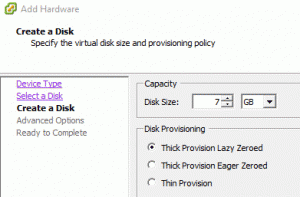
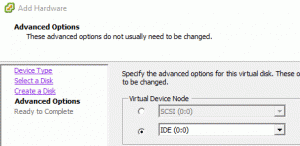
Be sure to select “IDE” as the disk type. This option may look a little like it is greyed out but it can be selected.
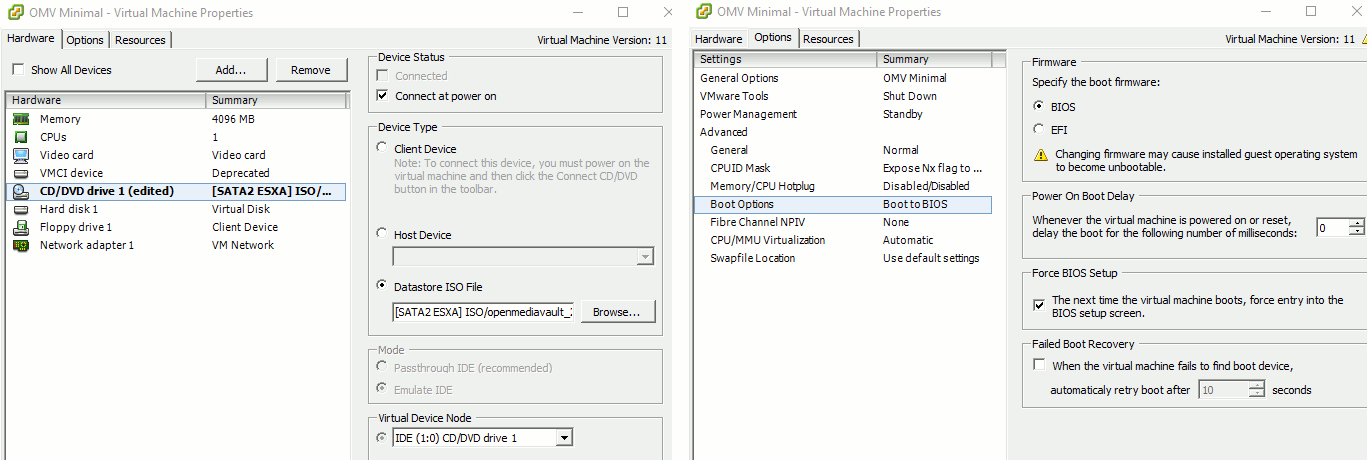
Once the HDD has been added go back and change the CD/DVD settings and change it so that it is connected at power on and is set to use the Open Media Vault ISO. Also you may need to go to the “Options | Advanced | Boot Options” and set “Force BIOS Setup – this will mean when you start the VM the next time it will take you to the BIOS where you can set the boot order so it boots the DVD first:
Install Open Media Vault
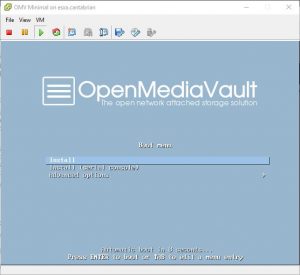
Start the VM booting into the ISO image you downloaded and select “Install”:
I am not going to go through each screen, there are plenty of sites that do that. however I will detail the ones to watch for.
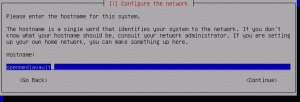
On the “Configure the network” screen put in the name you wish to give your OMV server:
On the next screen it asks for the domain, you may not use one and it is not mission critical. If you are in doubt look at the other machines on your network and replicate the domain name.
Both the hostname and domain name can be changed later on quite easily.
Next important screen is “Setup users and passwords”. You will be asked for the root password, this is important, so don’t forget it. But it can obviously be changed later very easily.
Keep accepting defaults and sensible answers as you move through the final screen “Finish the installation”.
Before you restart go into the VMware settings and disconnect the DVD drive.
After the reboot login to the VM as the user “root” with the root password you gave earlier.
Once in run “ifconfig” which will show you the IP of the OMV:
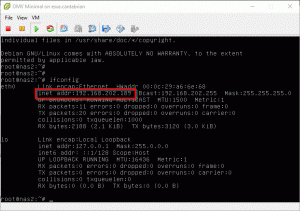
From your desktop open a browser to the IP listed and login. The username is “admin” and the default password is “openmediavault”. Just have a little look around to make sure it is basically ok and shut it down:
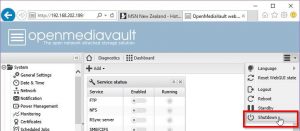
Once you VM is shutdown change the DVD settings in VMware so it now boots from the Debian Live ISO and restart the VM.
Once you are in the Debian live system start up a terminal and “sudo su – root” so you are doing things as root.
Before you start install “dcfldd”. This is an enhanced version of “dd” which includes a vital status message so you can see how far your backup is progressing.
apt-get install dcfldd
Now create a mount point and map it to a shared drive on your network:
mkdir /nas1
mount -t cifs -o username=joe,password=joesPassword //192.168.202.44/sata1 /nas1
cd /nas1
Run “lsblk” to see what drives you have:
root@debian:/nas1# lsblk
NAME   MAJ:MIN RM  SIZE RO TYPE MOUNTPOINT
fd0      2:0    1    4K  0 disk
sda      8:0    0    7G  0 disk
├─sda1   8:1    0  6.7G  0 part
├─sda2   8:2    0    1K  0 part
└─sda5   8:5    0  341M  0 part
sr0     11:0    1  1.2G  0 rom  /lib/live/mount/medium
loop0    7:0    0  1.1G  1 loop /lib/live/mount/rootfs/filesystem.squashfs
In the above example you can see sda has 3 partitions, which is your OMV install, while sr0 is the DVD drive.
Now run “fdisk -l /dev/sda” to get the details:
root@debian:/nas1# fdisk -l /dev/sda

Disk /dev/sda: 7 GiB, 7516192768 bytes, 14680064 sectors
Units: sectors of 1 * 512 = 512 bytes
Sector size (logical/physical): 512 bytes / 512 bytes
I/O size (minimum/optimal): 512 bytes / 512 bytes
Disklabel type: dos
Disk identifier: 0x00080b9b

Device     Boot    Start      End  Sectors  Size Id Type
/dev/sda1  *        2048 13977599 13975552  6.7G 83 Linux
/dev/sda2       13979646 14678015   698370  341M  5 Extended
/dev/sda5       13979648 14678015   698368  341M 82 Linux swap / Solaris
So from the above you can see the sectors are 512 bytes and there is 14680064 sectors.
To back it up use “dcfldd”:
dcfldd bs=512 if=/dev/sda | gzip -c > omv2.1_vanilla_7gb-hdd_2-7-2016_512k-blocks.img.gz
So in the above example “bs=512” is setting the block size to 512. It works out much better if you set the block size the same as the sector size then the numbers will be the same. You should get something like:
root@debian:/nas1# dcfldd bs=512 if=/dev/sda | gzip -c  > omv2.1_vanilla_7gb-hdd_2-7-2016_512k-blocks.img.gz
14680064 blocks (7168Mb) written.
14680064+0 records in
14680064+0 records out
Notice also the total number of records in and out is 14680064 which is exactly what fdisk reported. Obviously you will now find a file called “omv2.1_vanilla_7gb-hdd_2-7-2016_512k-blocks.img.gz” on your network share.
I have a personal preference to include the number of records in the file name so when it comes to restore I know everything has gone ok:
mv omv2.1_vanilla_7gb-hdd_2-7-2016_512k-blocks.img.gz omv2.1_vanilla_7gb-hdd_2-7-2016_512k-blocks_14680064-records.img.gz



![[L] – WordPress UAM Locked Post](http://www.zoyinc.com/wp-content/uploads/2024/04/WordpressUAMLockedPost_Featured.jpg)
