All modern hard drives come with SMART, Self-Monitoring, Analysis, and Reporting Technology, which in essence allows you to monitor the status of your disks and if they have any errors. This will often alert you to dangerous situations where you have a disk that might be failing.
SMART is not always going to save you but it’s probably the best and easiest thing you can keep an eye on. This post is about how to enable this and ensure that you get email alerts from Open Media Vault if there are SMART errors.
What to do
First ensure your OMV box is sending emails, this is configured under “System | Notification” and you can get more info from the posts http://www.zoyinc.com/?p=2461 and DNS problems, email notifications not being sent for more information. You should ensure you are getting some sort of regular email from OMV – its not going to be much use monitoring if you don’t get the alert.
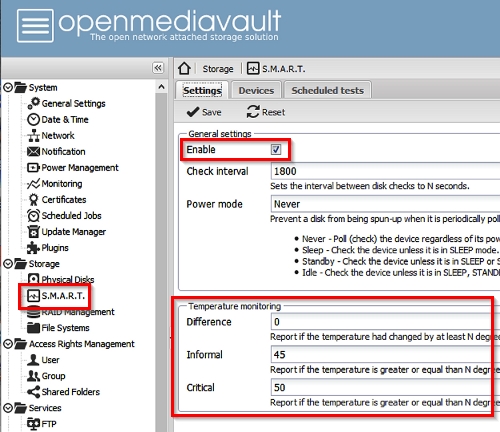
Go to “System | S.M.A.R.T.” and ensure you have selected the “Settings” tab.
You need to select “Enable” and set some values for the temperature monitoring. For this I did a bit Googling and put some reasonable temperatures – don’t just copy mine 🙂 :
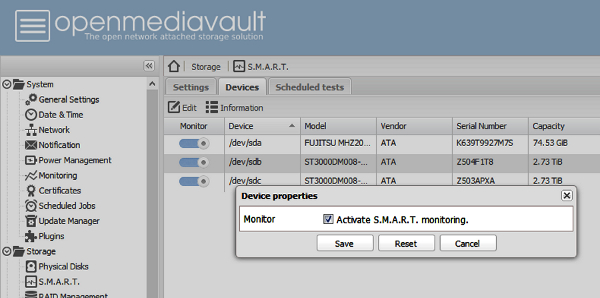
Now select the “Devices” tab and this will list the drives you have. Select a drive and click on “Edit” this will give you the dialog below, ensure you select “Activate S.M.A.R.T. monitoring.” and click on “Save”.
Do this for all your disks, including SSDs and your system disk if it is separate like mine is:
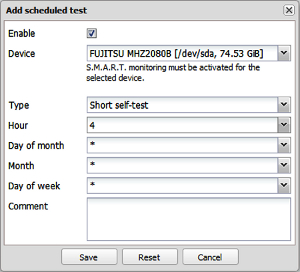
Next select the “Scheduled tests” tab and add a scheduled job for each disk, it should look something like below. Obviously ensure it is enabled, you have picked “Short self-test” and a time, in this case at 4am every day.
Repeat this for all disks and when finished click on apply as normal.
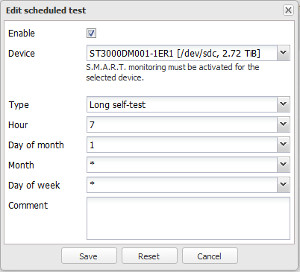
I would suggest you also set up a regular long self-test, maybe on the 1st of the month:
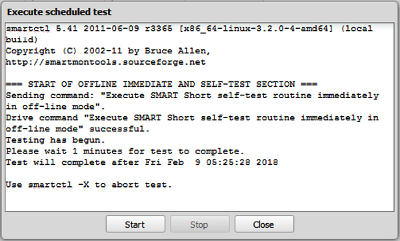
Having done this for each disk for each scheduled task, select the task and click on run and click on “Start” from the dialog as below. You don’t need to wait for the test to complete, just click on “Close”.
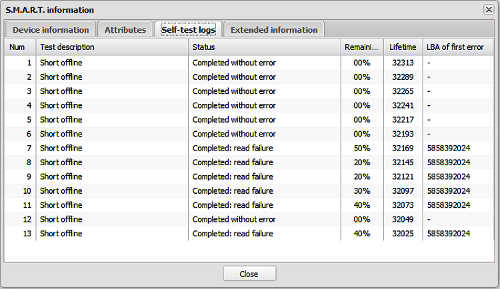
After you have run the tests for all the disks go back to the “Devices” tab and select a disk and click on “Information” this will bring up a dialog with various bits of info including a “Slef-test logs” tab – select this. Hopefully you should see the tests completed ok. Below is an example where it didn’t work, unfortunately this is a failing drive for me that needs to be replaced:
Email alerts
If there are any errors you should receive an email like:
SMART error (OfflineUncorrectableSector) detected on host: nas2 [nas2.mydomain]
This email was generated by the smartd daemon running on:
host name: nas2
DNS domain: mydomain
NIS domain: (none)
The following warning/error was logged by the smartd daemon:
Device: /dev/disk/by-id/scsi-SATA_ST3000DM001-1ER_Z5001LCQ [SAT], 2552 Offline uncorrectable sectors
For details see host’s SYSLOG.
You can also use the smartctl utility for further investigation.
The original email about this issue was sent at Sat Jan 27 17:46:54 2018 NZDT Another email message will be sent in 24 hours if the problem persists.



![[L] – WordPress UAM Locked Post](http://www.zoyinc.com/wp-content/uploads/2024/04/WordpressUAMLockedPost_Featured.jpg)
