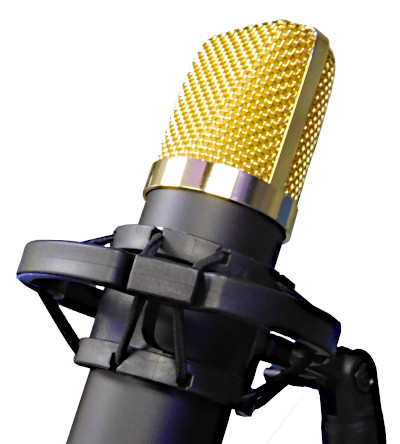
 I have a Nikon Coolpix S7000 compact camera that I use for most things. Its showing it’s age and it would be nice to replace it – one day. The other day I learned a painful lesson, this camera has terrible audio, specifically it adds a lot of hiss to recordings.
I was using it to record an intro to one of my YouTube videos and the hiss just completely ruined it. I tried everything but nothing helped, the hiss was built into the camera, it wasn’t background noise or wind or even camera motors – it was straight all out, built in, hiss.
So I tried my son’s PowerShot SX430 IS, but alas it was just as bad. Checking with Dr Google it appears this is a common problem with compact cameras. The situation is not helped by the fact that these cameras rarely come with a mic socket.
What to do …
So after some digging I found that Audacity actually does a really good job of removing hiss – it does lots of other stuff that’s cool, but I am focused on hiss.
Its worth noting my video editor of choice is VSDC, it’s not Adobe Premier or Final Cut Pro, but it does run on lower spec’d hardware, which is me. While it does take a while to get up to speed using VSDC, I have been reasonably happy with it – put it this way I paid for the “pro” version.
A standard video file, mp4/avi/mov, contains an audio track/s and a video stream multiplexed together to form a single identity where the audio and video components are time locked together so they are always in sync. Video editors will allow you to separate the video and audio into separately editable components:
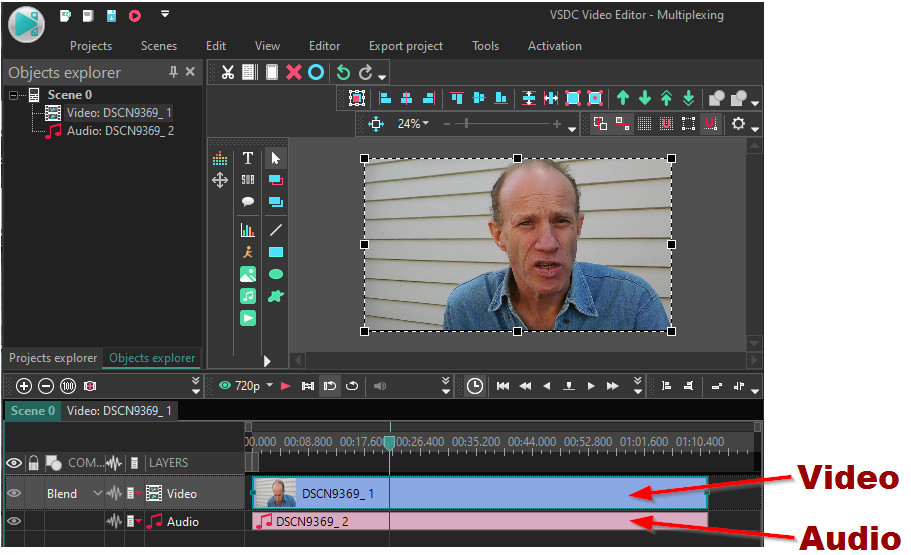
In VSDC the primary tool for cutting and editing a video is the “Cutting and splitting” tool. This tool only works with one file at a time – it could be a standard multiplexed video or only audio. Thus if your video file contains both a video stream and an audio track it will cut and split them in sync. So it appears that for VSDC it is way better if you have the video and audio in the one file and don’t split it into separate audio and video files. For this reason I wanted to find a way to clean up the audio hiss without any loss in video quality and to end up with a multiplexed file containing both the audio and video.
In my research I discovered Audacity and was surprised and happy to find out just how much hiss it can remove. However the problem remained that while it can extract the audio from video files Audacity only outputs fixed audio. It doesn’t take a video file, edit the audio and return a video.
I wanted a method that removed the hiss but did not alter the video stream. While I am moderately happy with my video quality I really don’t want the quality dropped at all if I can help it. This post is about how to remove hiss from a video file but leave the video completely unchanged.
Install the software
Resources
Audacity
Open Source easy-to-use, multi-track audio editor and recorder
https://www.audacityteam.org/
FFmpeg
A complete, cross-platform solution to record, convert and stream audio and video.
https://ffmpeg.org/
Buanzo
Lame and FFmpeg libraries for Audacity – Free and Safe downloads
https://lame.buanzo.org/
VSDC
Free video editor
http://www.videosoftdev.com/free-video-editor
MKVToolNix GUI
A set of tools to create, alter and inspect Matroska files
https://mkvtoolnix.download/downloads.html
Installation
First thing to install is Audacity, https://www.audacityteam.org/ I installed the Windows “Audacity 2.3.1 installer” version – currently “audacity-win-2.3.1.exe”. When installing accept all the defaults.
We also need the ffmpeg library installed into Audacity. On the Windows download page in Audacity there is a link in the section “Optional Downloads | Plug-ins and Libraries”, look for the link “FFmpeg import/export library” which takes you to the section about installing FFmpeg. Look for “Alternative zip download for FFmpeg 2.2.2” and below that click on the “external download page” link. This takes you to https://lame.buanzo.org/#lamewindl , which I find quite confusing, however look for “RECOMMENDED ZIP OPTION: ffmpeg-win-2.2.2.zip” and download the zip.
You now need to unzip the file and put the contents somewhere. For me I created a folder:
C:\Program Files (x86)\Audacity\ffmpeg
And unzipped it to there. Note that on Windows 10 you may get permission problems unzipping directly and you may have to extract to, say “C:\Temp\ffmpeg” and then copy to the desired folder. Remember it can be any folder at all.
Configure the ffmpeg library in Audacity:
- Open up Audacity, then select:
Edit | Preferences…
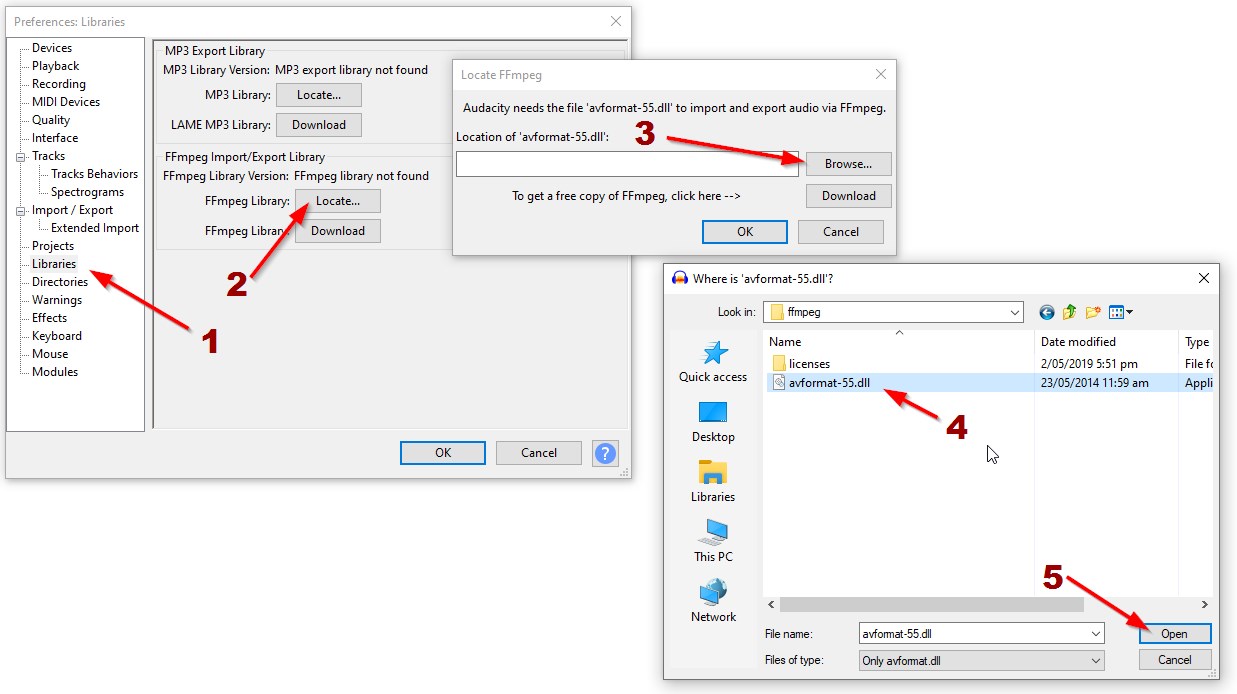
- Navigate to “Libraries”
- Click on the “Locate…” button for the “FFmpeg library”.
- In the “Locate ffmpeg” dialog click on the “Browse…” button
- Find the file “avformat-55.dll” and click “Open”
- Finally click on “OK” and then “OK” to save this.
Next install MKVToolNix GUI. You need to go to https://mkvtoolnix.download/downloads.html#windows from there you will see a link to fosshub https://www.fosshub.com/MKVToolNix.html – I downloaded the “MKVToolNix Windows installer (64-bit)“. This is currently “mkvtoolnix-64-bit-33.1.0-setup.exe”. Use this exe to install MKVToolNix GUI – accept all defaults.
How to reduce hiss in videos
Audacity uses the ffmpeg library to open up video files and then to extract the audio content, thus. So start up Audacity and open your source video, in my case “C:\Temp\Audacity\OriginalVideo.MOV“. This will display the audio content:
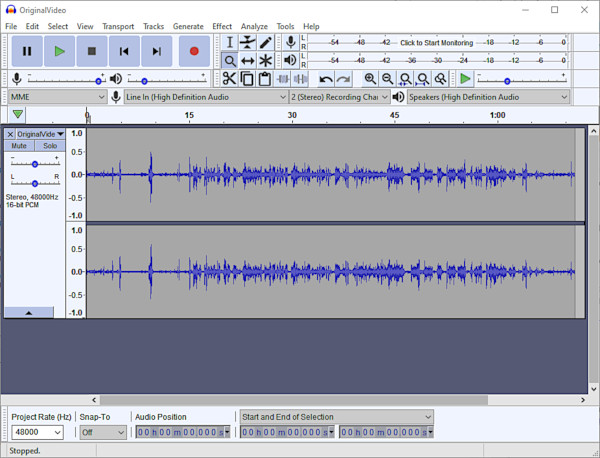
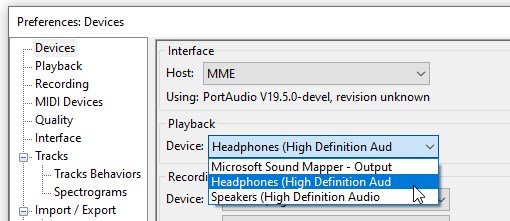
Ensure you have the correct output device. Again go to “Edit | Preferences” in Audacity and then select “Devices and set the correct “Playback” device:
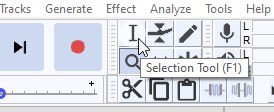
Next you need to change the cursor to the Selection Tool, the mouse cursor that looks like “I”:
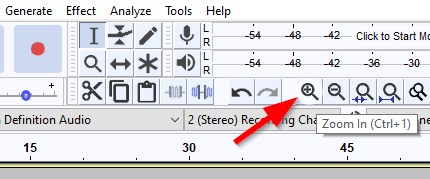
Now zoom into the audio track by clicking on the zoom in button:
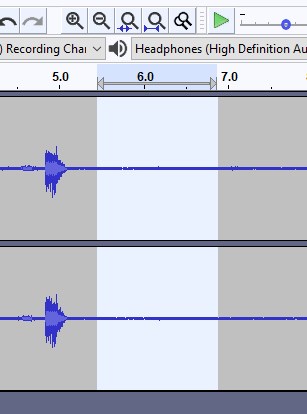
 Next identify a section of the audio where there is only background noise or hiss. Just play the track until you get an area where there is no talking etc. Once you have found this section highlight it by using the mouse and selecting it:
Next select “Effect | Noise Reduction…”. This will show the “Noise Reduction” dialog. In this click on “Get Noise Profile” button. This will be very quick.
Now you need to select all of the audio track so select “Select | All” to select all the audio. Again select “Effect | Noise Reduction…” and in the “Noise Reduction” dialog this time just click on “OK” and it will clean up the audio:
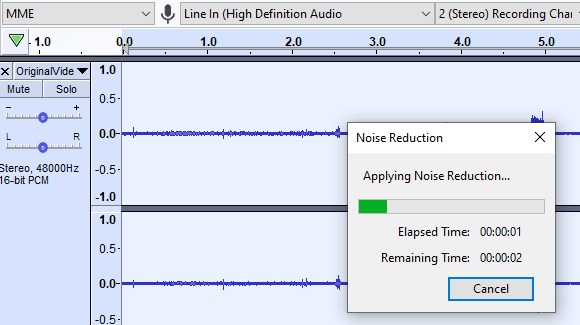
You should now see that the quiet section of the audio track is now not as thick as it was before, so play the audio and hopefully you should notice a noise reduction.
Next select “File | Export | Export Audio…” and save the audio using whatever format works for you and in a location that works for you, I saved it as “C:\Temp\Audacity\OriginalVideo.flac” – my preference is to use FLAC as it is lossless. You will be presented with a “Edit Metadata Tags” dialog, you don’t really need to put anything here, so just click on “OK” to save.
We are now finished with Audacity so you can close it.
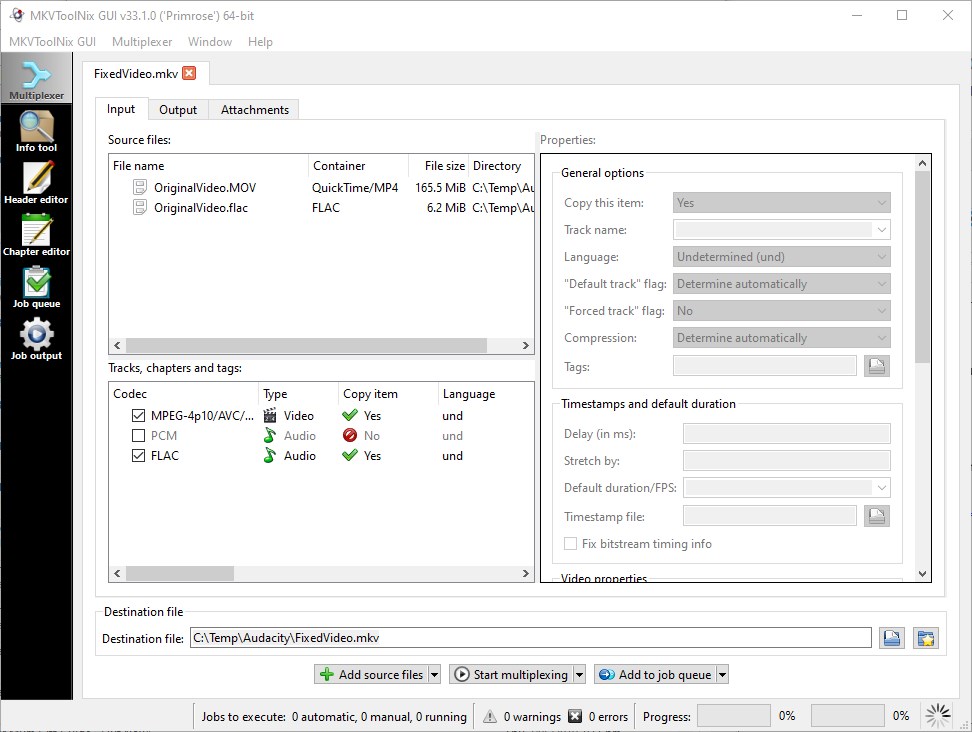
Open up “MKVToolNix GUI”. The default view should be “Multiplexer”, right click in the area “Source files:” and select “Add files”:
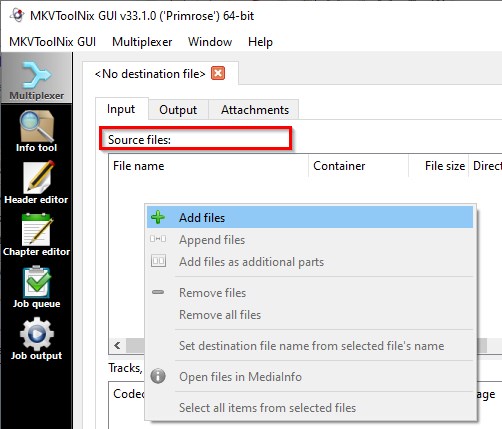
Select your original video, the noisy/hissy one. In my case “C:\Temp\Audacity\OriginalVideo.MOV“.
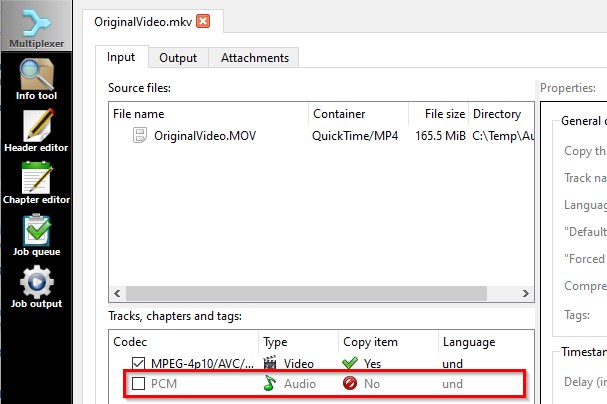
MKVToolNix will now show both the audio and video tracks from your video in the “Tracks, chapters and tags:” pane. You need to untick the audio track. When you have done that it will show a red circle and “No” in the “Copy item” column:
Next add the audio you just created in Audacity by again right clicking the in the “Source files:” area and selecting “Add files”. In our case this time we selected “C:\Temp\Audacity\OriginalVideo.flac“.
Next set the destination file, in our case “C:\Temp\Audacity\FixedVideo.mkv”. This should give you:
You are all ready to begin so click on “Start multiplexing”. This should be pretty fast as it doesn’t have to do any video compression just multiplexing the files together.
Its all finished, go ahead and view the fixed video.
No video loss
You can see that at no point did we edit or re-code/re-compress the video, we simply extracted the audio, reduced the noise and multiplexed it again with the original video stream.
And this is the difference it can make:



![[L] – WordPress UAM Locked Post](http://www.zoyinc.com/wp-content/uploads/2024/04/WordpressUAMLockedPost_Featured.jpg)
