I have two primary servers I use all the time, the first is the WordPress VM which run the Zoyinc website and secondly a VM that runs MythTV. Both are currently running Fedora – WordPress is on F18 and MythTV is on F16. These were installed in July 2012 and February 2011 respectively. So pretty old in the tooth.
The plan is to create a base image that would be used for the next version of both servers and potentially anything else that comes along.
This post is not a lesson on using VMware nor is it a lesson in Linux.
NOTE: During the setup of this VM the name of the host changed from “centos7_template” to “centos7-template” and finally to “centos7-base” due to things like netbios only allowing 15 characters. So some screenshots may have different names
My Setup
I am doing this on ESXi 6.0 Update 3 due to my physical hardware not being supported on ESX 6.5. So I am slightly limited by 6.0.
With the advent of ESX 6 use of the “vSphere Client” was deprecated and no longer worked very well. The replacement is the “VMware Host Client”, a web interface. This is what I have been using.
My hardware is a Lenovo M58 (7479CTO) small form factor. Which has a Intel(R) Core(TM)2 Duo CPU E8400 @ 3.00GHz.
VM Creation
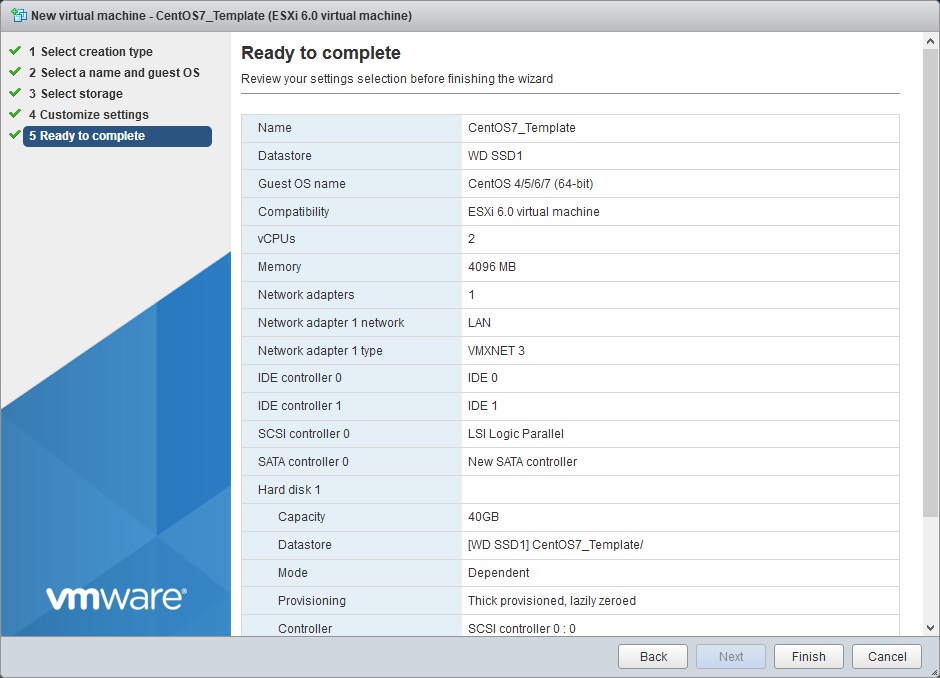
For this VM the setup when creating the VM was
VM Name: centos7-base
Compatibility: ESXi 6.0 virtual machine
Guest OS: Linux
Guest OS Version: CentOS 4/5/6/7 (64-bit)
CPU: 2
Cores per Socket: 1
Hard Disk: 40 GB (Always find I run out of space in later years so lots of room to grow)
Type: Thick Provisioned, lazy zeroed
RAM: 4096
SCSI Controller 0: LSI Logic Parallel
Network Adapter 1: VMXNET 3
Boot Options
– Firmware: BIOS
– Boot Delay: 5000 milliseconds
 I hooked up the CentOS 7 ISO, CentOS-7-x86_64-DVD-1810.iso
Start the VM and select “Install CentOS 7” and press <Enter> when prompted.
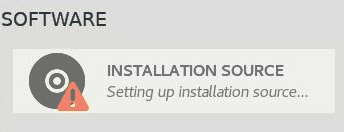
From the “Welcome to CentOS 7” screen select the appropriate language and select “Continue”. This will take you to the “Installation Summary”. You will likely see a couple of brown triangles, “setting up installation source…”/”downloading group metadata…” as below, just give it a minute or so to complete these tasks before continuing.

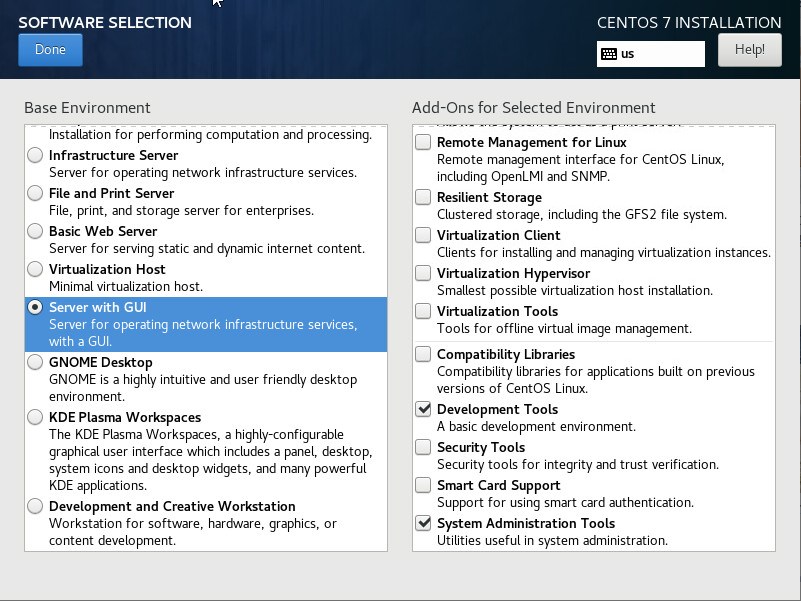
Click on “Software Selection” screen select “Server with GUI” as the base environment and then also select the add-ons of:
- FTP Server
- File and Storage Server
- Development Tools
- System Administration Tools
Then click on “Done”
Now it will once again go off and “Checking software dependencies”.
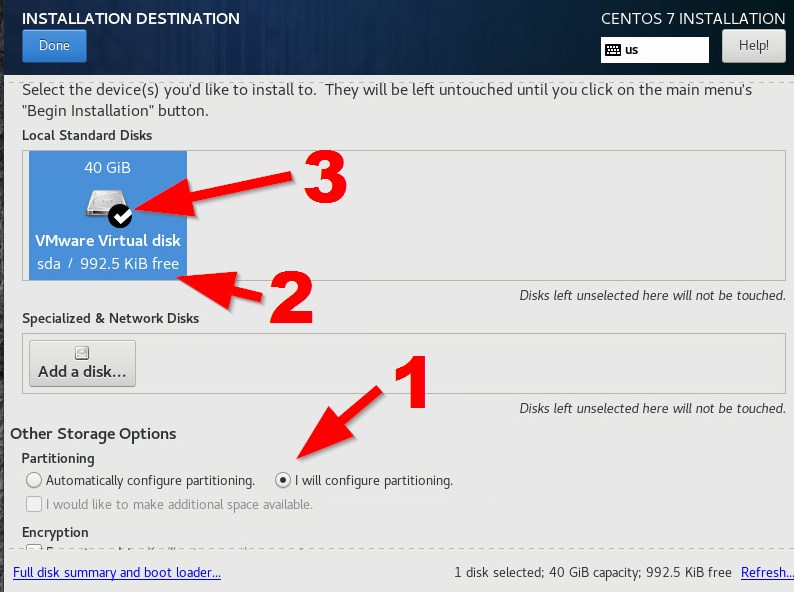
At this point I want to partition as I want so select “Installation Destination”: Under “Other Storage Options” select “I will configure partitioning” and click on the VMware Virtual disk:
Ensure that the device, VMware Virtual disk, has been selected with a white tick showing:
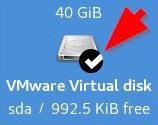
Then click on Done.Because you selected the disk and you want to configure partitioning you will then get to the manual partitioning screen.
If you had a previous install of CentOS you will see an entry like “CentoOS Linux Linux 7.6 …”.
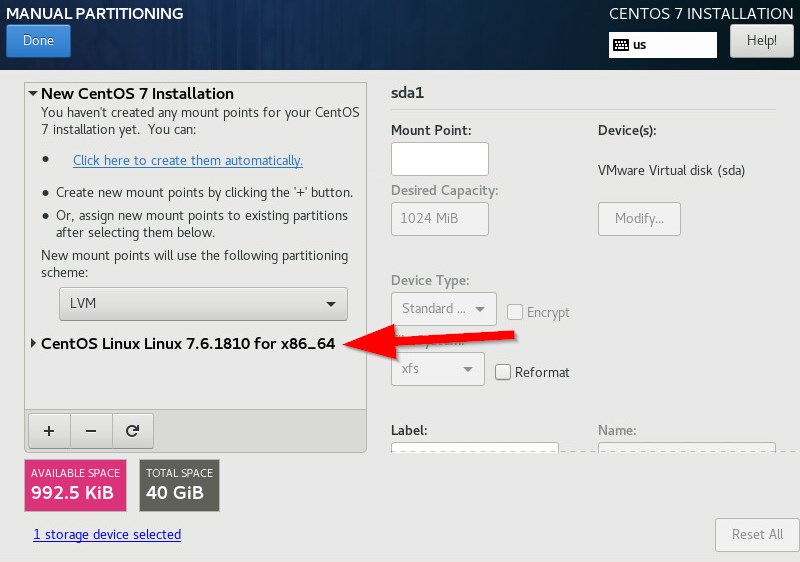 If you have a previous install of CentOS expand the partitioning by clicking on it as above. This will expand to show
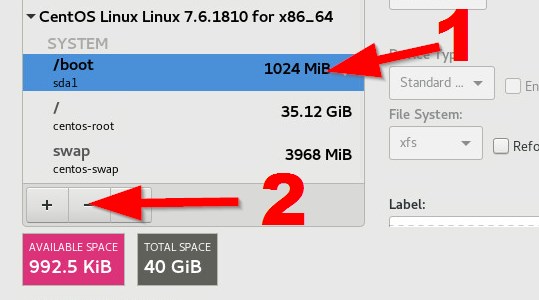
Select the “/boot” mount and click on the “-” button to remove it. You will get a dialog:

From here select “Delete all file systems which are used by CentOS Linux…” and then click on “Delete It”. This should remove the line “CentOS Linux Linux 7.6.1810 for x86_64”.
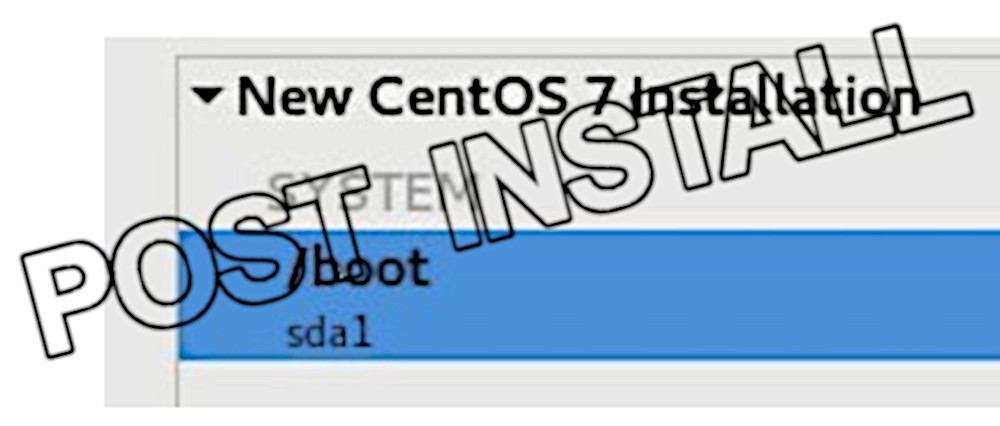
On the same screen in the “New CentOS 7 Installation” section click on the “partitioning scheme” dropdown, which currently says “LVM”:
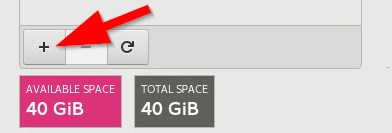
This will bring up the “Add a new mount point”. To begin with create a “/boot” mount with 300 MB and click “Add mount point”:
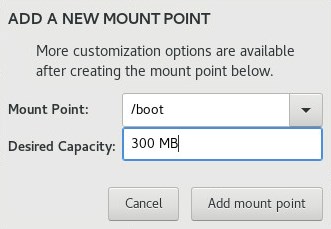
Moving forward I would suggest you set the boot to 500 MB to allow for backup kernels that can accumulate
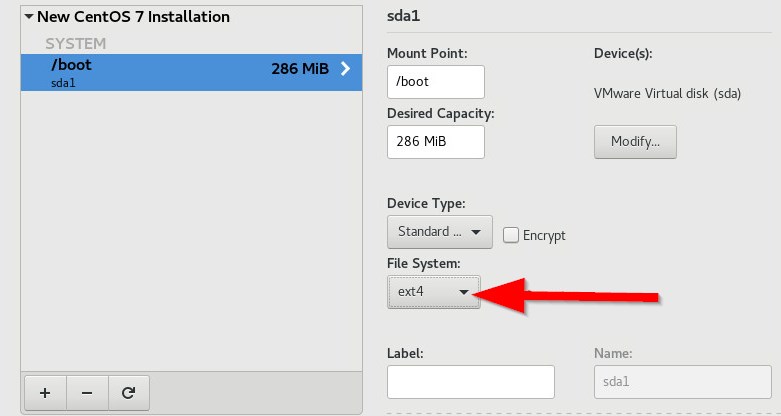
This will show below. At this point I changed the “File System” to “ext4” because it suits my purposes better:
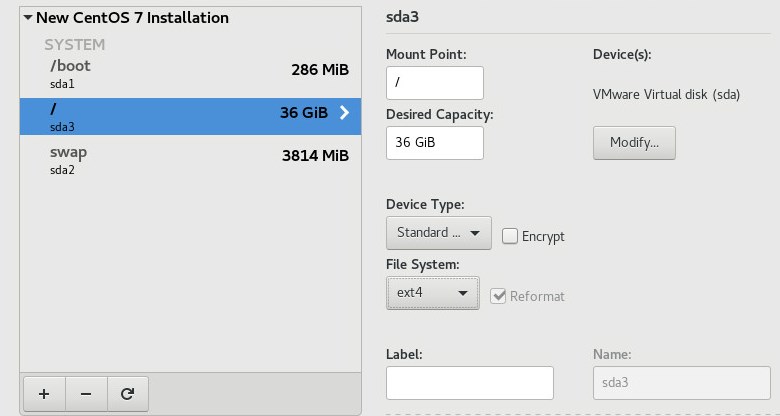
Using the same process create mount points for “swap” of “4 GB” and “/” with no capacity, because “/” will use all remaining space. I did not add “/var” or “biosboot”. Note that as with “/boot” I have set “/” to be “ext4”. This should now look like:
Click on “Done” to move back to the “Installation Summary”, you will get prompted with a “Summary of changes”, click on “Accept Changes” to continue.
Back on the summary screen click on “Network & Hostname”:
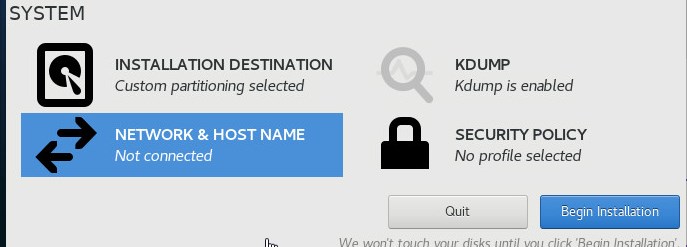
On the “Network & Hostname” screen set your desired hostname – I set mine to “centos7-base.cantabrian”, because our workgroup is “cantabrian” – don’t forget to click on apply..
Next click on the “Configure…” button then from the configuration screen:
- Select the “IPv4 Settings” tab
- Set the “Method” to “Manual”
- Add a static IP, netmask and gateway
- Put in your DNS servers, mine are Google. This is a comma separated list.
- In search domains put your workgroup/domain names
- Click on “Save”
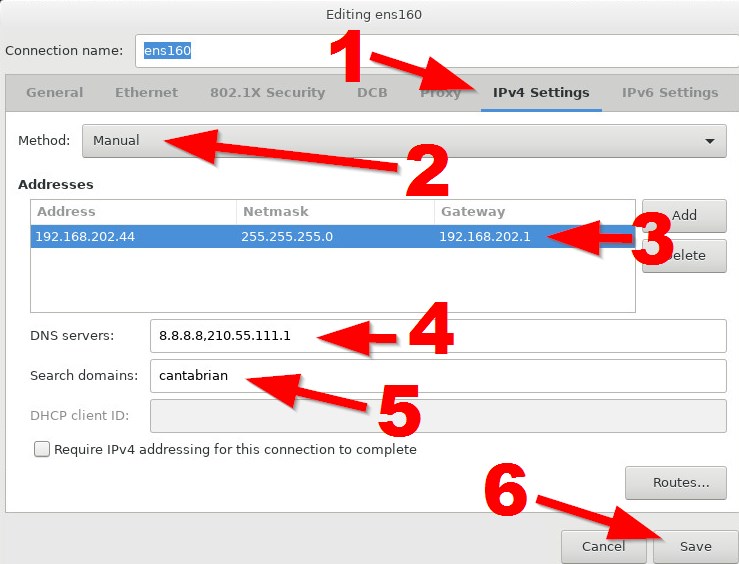 ,8.8.8You will now be back on the “Network & Hostname” screen click on “Off” to connect the network:

Click on “Done” to get back to the “Installation Summary”.
Now click on “Begin Installation”. This will take you to the configuration screen. Click on “Root Password” to set the root password. The installation process will begin:

When it’s finished you will see:

So just click on “Reboot”.
When you reboot you will get the “Initial Setup” screen just click on “License Information” and select “I accept the license agreement” followed clicking on “Done”. Finally click on “Finish Configuration” and you are done.
All you need to is the standard user, keyboard, regional settings and so on.
Once finished you will need to disconnect the ISO so it doesn’t try to keep installing.
Post install steps
Now you have the base VM you will need to consider post install steps. For me, creating a base for WordPress and MythTV I created the post CentOS 7 VM for WordPress and MythTV – Post install setup




![[L] – WordPress UAM Locked Post](http://www.zoyinc.com/wp-content/uploads/2024/04/WordpressUAMLockedPost_Featured.jpg)
