 MythTV is the best Open Source media recording application MythTV Wiki
This article follows the path I traveled when setting up a new MythTV server running on CentOS 7. The setup I followed in setting up the host is detailed firstly in CentOS 7 base VM for WordPress and MythTV then in CentOS 7 VM for WordPress and MythTV – Post install setup
When setting up this host one of the primary goals was to make everything easily up gradable. This has meant doing things “the right way”, which has meant using Software Collections a lot. It also was the reason for choosing CentOS 7 as it has a long supported life. Note that at the time of doing this exercise CentOS 8 was not yet available, let alone supporting Software Collections and other rpms, so a pragmatic choice.
MythTV infrastructure overview
The first MythTV setup I had was a dedicated desktop machine with a most hard drive and a Hauppauge terrestrial tuner card. This was fine and worked but when things went wrong it got to be more and more of a pain. But when the server died it as a bit of a disaster.
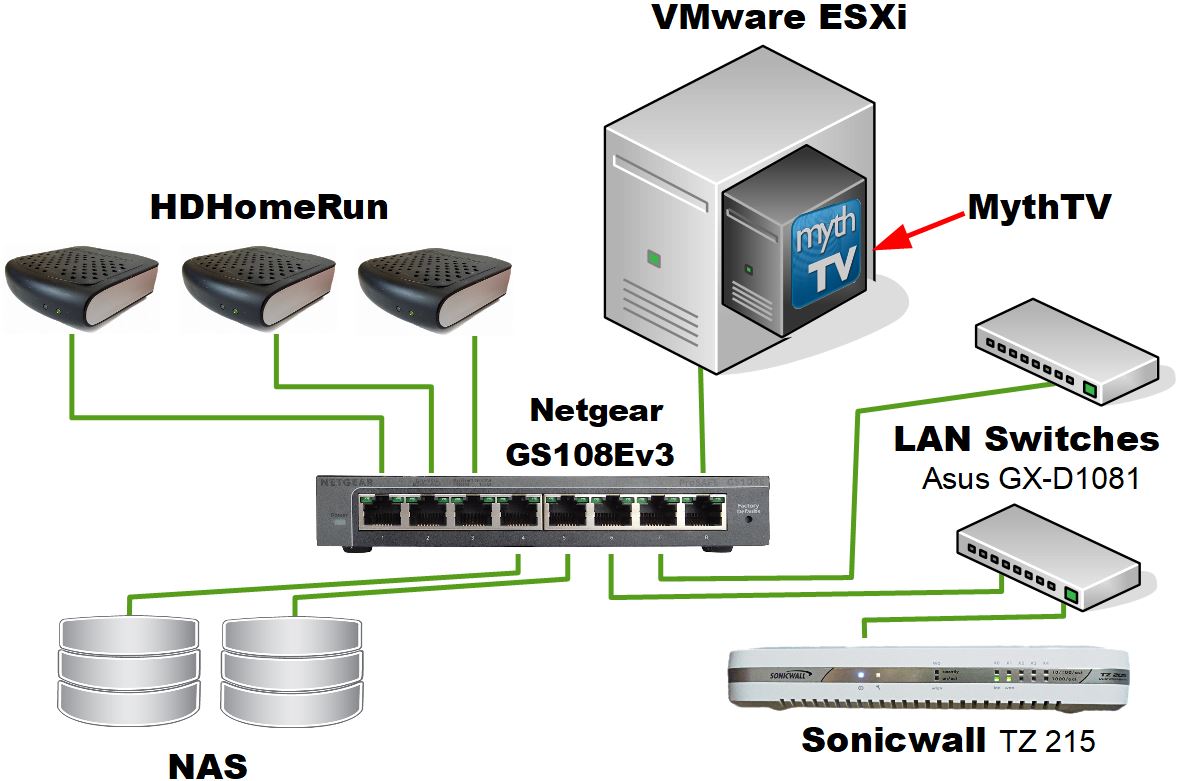
The setup described in this post is designed to make things robust and easy to move on from various disaster scenarios. My setup is:
- MythTV running on CentOS 7 on an ESXi desktop
- Storage is on NAS servers running Open Media Vault with mirrored disks
- Tuners are HDHomeRun
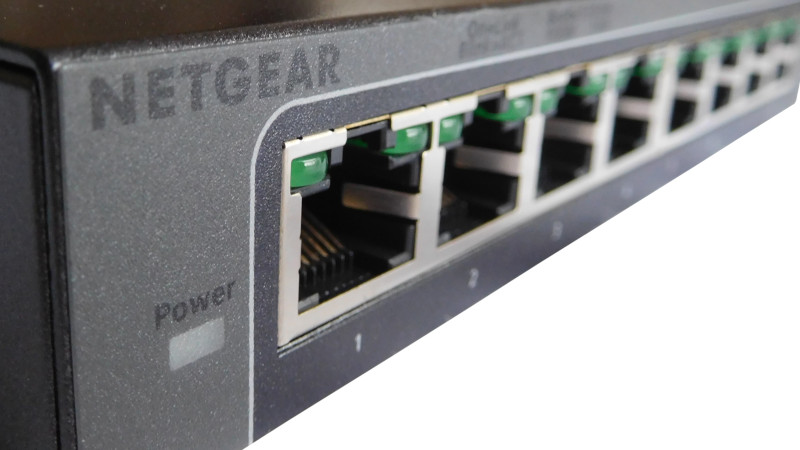
- Networking, VLANS etc are on a SonicWall TZ 215 with Netgear GS108Ev3 managed switch
ESXi
I have been using ESXi for approximately the last 10 years and for the last few years I have been using it for my primary servers at home – MythTV and Zoyinc website. I run it on standard small form factor , SFF, Lenovo M58 (7479) desktops which have a Intel(R) Core(TM)2 Duo CPU E8400 @ 3.00GHz along with 8 GB of RAM and a budget 128 GB SSD.
Periodically, when a make a major change, I backup the full VM to the NAS. Every night I back up all the important files on both of my VMs to my NAS boxes. So if I loose a VM or an ESX host the worst case scenario is I run a backed up copy on the other ESX box. Additionally, because the Lenovos are relatively cheap, I have at least one spare Lenovo I can press into service as an ESX host – it is already configured and tested as an ESX host.
NAS
Having a good reliable storage is very important for both MythTV and for my personal storage so I looked around and are using Open Media Vault, see my post Open Media Vault. I have two NAS boxes with each having dual 3TB 7200rpm Seagate drives in a mirror, RAID 1.
I was originally skeptical that NAS would work for MythTV due to the high concurrent writing and reading it does. However it works fine for me and looking at the posts on mythtv-users I can see lots of others do the same thing. It certainly resolves the MythTV storage backup and resilience problem. I have the main MythTV VM on the SSD drive on the ESX box because that is pretty small – this includes the DB.
HDHomeRun
What can I say, they are excellent and so many mythtv-users are using them. In terms of network Terrestrial tuners they simply have no equal. More than that they make the whole VM strategy work.
Networking
I had prevously been using SonicWall firewalls both in my Job and at home for quite along time and they are great. For MythTV I have found I really needed the HDHomeRuns on a different subnet, isolated from my LAN.
I earlier had my SonicWall at the center of my MythTV networking but now that has changed and I have the Netgear switch at the center with the SonicWall just being the internet connection and adding a DHCP server for the VLAN used by the HDHomeRuns. See the post Port-based VLAN on managed switch to ESXi:
 Also see MythTV with HDHomeRuns on VLAN describes my earlier setup setup. Also see SonicWall VLAN to private physical interface.
Setting up the base VM
In the process of getting to this post I have done two major hops.
The first is CentOS 7 base VM for WordPress and MythTV which is where I created a base VM with CentOS 7 and which is suitable for WordPress or MythTV, but still a generic VM. For me this base VM is called “centos7-template”.
Using this centos7-template VM I did the tasks in WordPress and MythTV – Post install setup to further enhance the VM to add things like MariaDB, PostgreSQL, SVN Samaba and so on. This produced a VM called “centos7-base”. This is the base for this post
So copy the VM “centos7-base” and rename all references to “MythSvr2” as this is the name for the server I am using for this post.
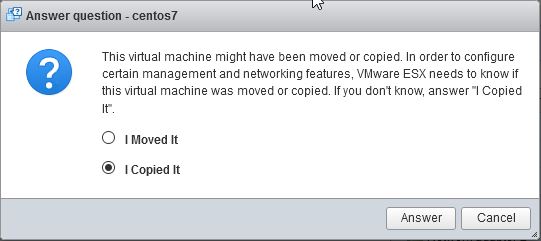
NOTE: When you copy the base VM, “centos7-base”, when you start it you will get a prompt “This virtual machine might have been moved or copied…”. To this you should say “I copied it“. If you don’t do this then you will get machines with duplicate MAC addresses which will play havoc with your networking.
Now rename the host from “centos7-base.cantabrian” to “mythsvr2” using Rename a CentOS 7 host
I had a lot of various problems and have decided that calling the host something like “mythsvr2.cantabrian” is not a good idea. So I very strongly suggest you don’t put the domain/workgroup on the hostname and stick to something like “mythsvr”.
Prerequisite setup
Misc
Set sudo rights for mythtv. First backup the original sudoers file:
cp /etc/sudoers /etc/sudoers.ootb
Then edit “/etc/sudoers” and add the following at the end:
mythtv ALL=NOPASSWD: /usr/sbin/service mythbackend *
Now check the sudoers file is ok by running:
visudo -c
This should return:
/etc/sudoers: parsed OK
Create a mythtv user:
groupadd mythtv
useradd mythtv -d /home/mythtv -g mythtv -s /bin/bash
passwd mythtv
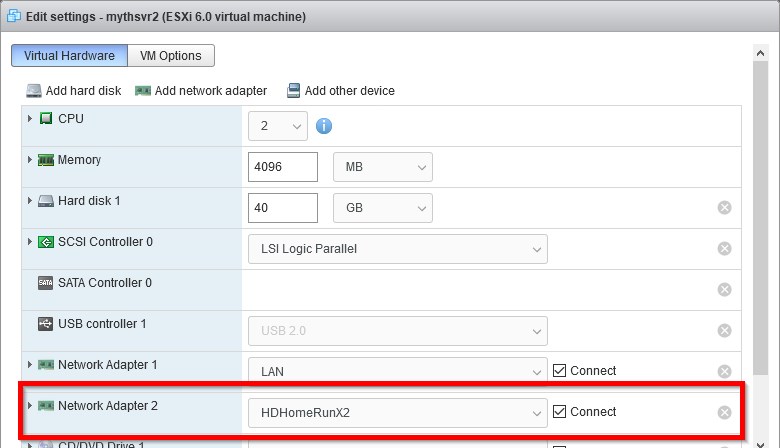
I am setting this system up based on my post MythTV with HDHomeRuns on VLAN. This has my HDHomeRuns on a separate VLAN so ensure this has been added and your VM restarted:
NAS shares
As I have said earlier, I store all my recording on two NAS shares, each on a different NAS host, so now would be a good time to map these. Start by creating two mount points:
mkdir -p /srv/mythtv/nas1
mkdir -p /srv/mythtv/nas2
chmod -R 2777 /srv/mythtv
chown -R mythtv.mythtv /srv/mythtv
Next you need to backup and then modify “/etc/fstab”. In my case I added the below two lines to mount the two NAS shares:
//192.168.202.35/mythtv2 /srv/mythtv/nas2 cifs username=mythtv,password=<secret password>,vers=1.0,iocharset=utf8,file_mode=0777,dir_mode=0777,noperm,_netdev 0 0
//192.168.202.36/mythtv2 /srv/mythtv/nas1 cifs username=mythtv,password=<secret password>,vers=1.0,iocharset=utf8,file_mode=0777,dir_mode=0777,noperm,_netdev 0 0
Clearly NAS1 has an IP of 192.168.202.36 and NAS2 an IP of 192.168.202.35 with the shares on both NAS boxes of “mythtv2”.
You can reboot to make it effective or just run:
mount -a
I would suggest restart just so you know it’s good.
MythTV setup
First we need to enable the rpmfusion repo. You should check https://rpmfusion.org/Configuration/ for latest instructions as they may have changed for the moment I ran:
yum localinstall –nogpgcheck https://download1.rpmfusion.org/free/el/rpmfusion-free-release-7.noarch.rpm https://download1.rpmfusion.org/nonfree/el/rpmfusion-nonfree-release-7.noarch.rpm
Because we are doing so much using Software Collections we need to ensure the correct collections this is enabled first:
scl enable rh-php72 rh-mariadb102 httpd24 bash
Now install MythTV:
yum install mythtv
Ensure permissions are correct:
chown -R mythtv.mythtv /usr/share/mythtv
chown -R mythtv.mythtv /etc/mythtv
Database setup
Now create the database, this is done using the script:
/usr/share/doc/mythtv-docs-29.1/database/mc.sql
You should edit this to suit your needs. My one is as below:
CREATE DATABASE IF NOT EXISTS mythconverg;
GRANT ALL ON mythconverg.* TO mythtv@localhost IDENTIFIED BY "<secret password>";
GRANT ALL ON mythconverg.* TO mythtv@'192.168.%' IDENTIFIED BY "<secret password>";
GRANT ALL ON mythconverg.* TO mythtv@'%' IDENTIFIED BY "<secret password>";
FLUSH PRIVILEGES;
GRANT CREATE TEMPORARY TABLES ON mythconverg.* TO mythtv@localhost IDENTIFIED BY "<secret password>";
GRANT CREATE TEMPORARY TABLES ON mythconverg.* TO mythtv@'192.168.%'  IDENTIFIED BY "<secret password>";
GRANT CREATE TEMPORARY TABLES ON mythconverg.* TO mythtv@'%' IDENTIFIED BY "<secret password>";
FLUSH PRIVILEGES;
ALTER DATABASE mythconverg DEFAULT CHARACTER SET utf8 COLLATE utf8_general_ci;
Now run the script:
mysql -u root -p < /usr/share/doc/mythtv-docs-29.1/database/mc.sql
Again you will be prompted for the MariaDB root password.
Initial config
Enable the backend service:
systemctl enable mythbackend.service
For myself I need to disable uPnP because I have two MythTV backends on the same subnet. So see my post, Two MythTV systems on the same LAN, for more details and instructions. In essence run:
systemctl edit mythbackend.service
This will open up nano with an empty file. Paste the following into the file:
[Service]
User=mythtv
ExecStart=
ExecStart=/usr/bin/mythbackend –noupnp –logpath /var/log/mythtv –verbose
Then run:
systemctl daemon-reload
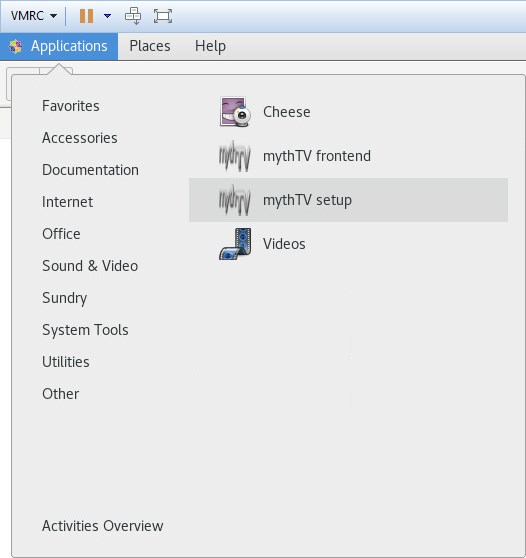
At this point you need to login to the UI as the mythtv user. I know some people don’t use the UI and run in headless mode, but for me one of the advantages of running as a VM in ESX is that you get a UI. From the Gnome menu select “Sound & Vision | mythTV setup”:
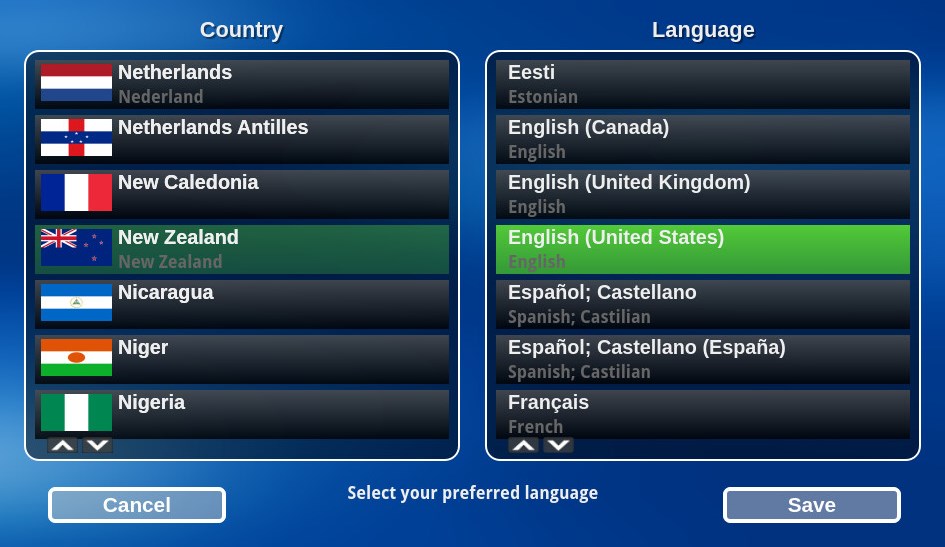
Set the correct country and language and click on “Save”:
This will give you an error “Cannot login to database”, click “ok” to enter your DB details:
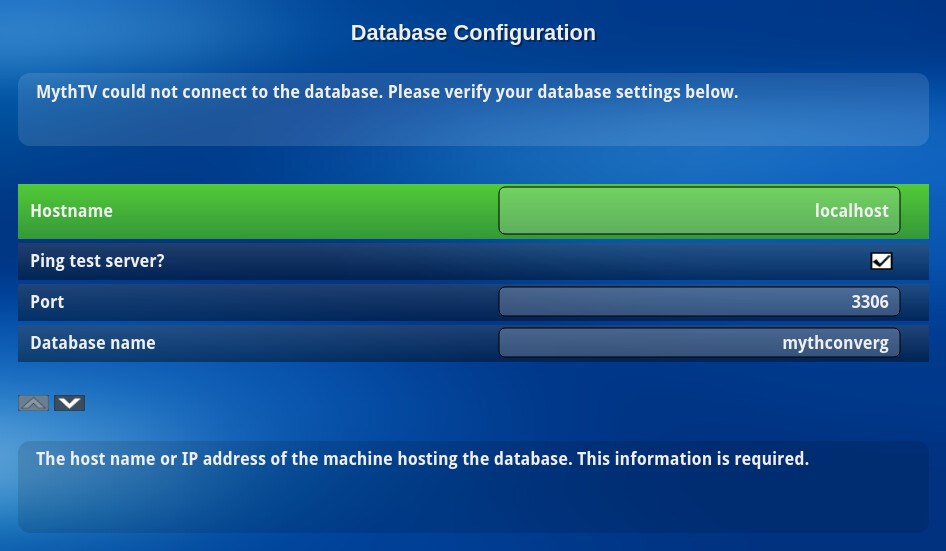
I personally find it difficult to navigate this as the scroll icons are a bit small. Just use the keyboard up and down arrows to move down and until your highlight “Password”, then hit <Enter>:
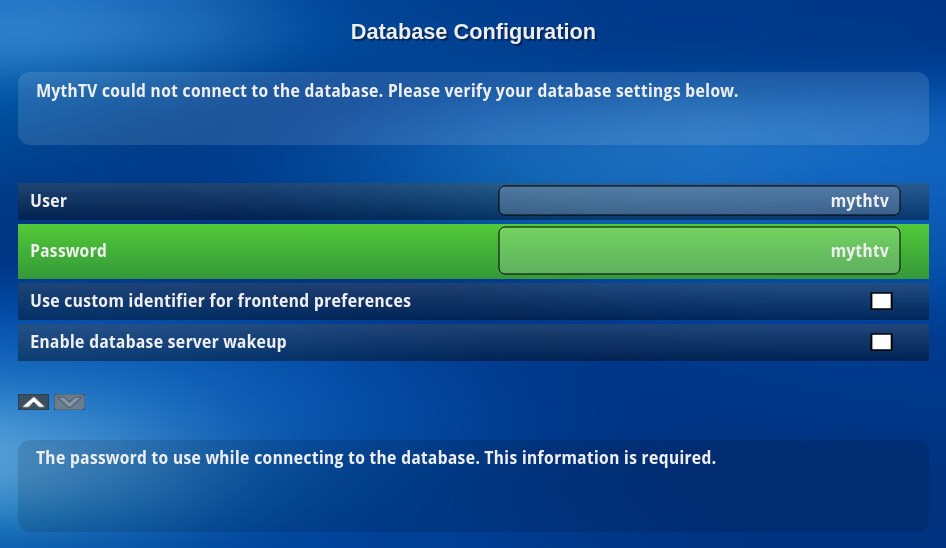

And click “OK” to save. To complete you need to press <esc> – I agree not obvious. You will be prompted to “Save then Exit” click this or press <Enter>. At this point it will take you back to the initial screen, I click on “Save” again, but I can’t be sure if that was necessary,. However if you do give save wait a bit for it to save and if necessary press <esc> again – again giving it time.
Now start the setup app again, “Sound & Vision | mythTV setup” and now you will be prompted to upgrade:
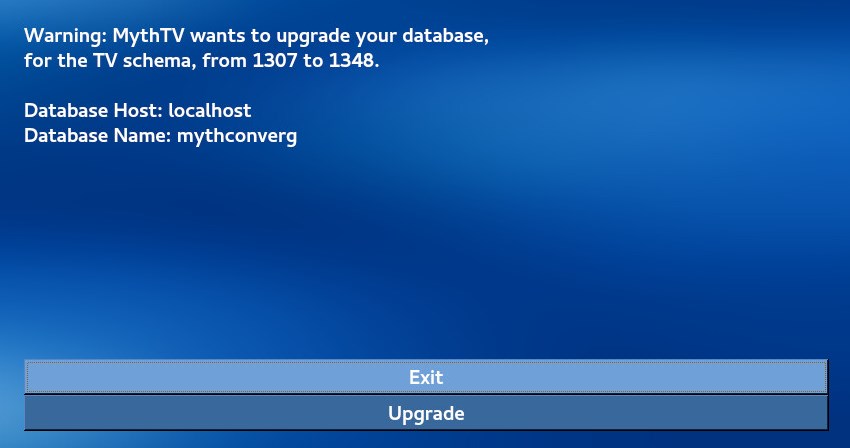
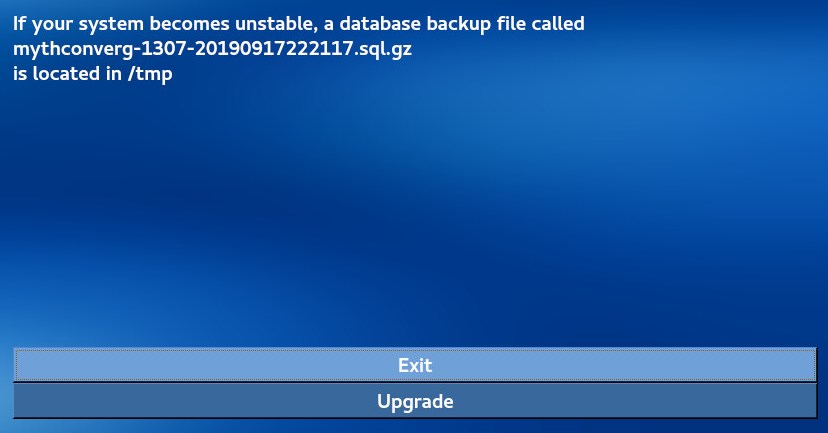
Click on “Upgrade” and you will get a message, again click on “Upgrade”:
Misc
Before you start the initial setup you need to create a soft link. This is because the mythbackend service file is configured to look for the config at:
/etc/mythtv/config.xml
Unfortunately this doesn’t seem to work for me because I run setup as the mythtv user and this users home directory is:
/home/mythtv
Creating a soft link means that everything continues to work and if I upgrade MythTV it “should” still work. Note that the install of the MythTV RPM will create an initial config file that needs to be deleted.
Run:
rm /etc/mythtv/config.xml
ln -s /home/mythtv/.mythtv/config.xml /etc/mythtv/config.xml
Basic Setup
If you are not taken to the main setup then again run “myth TV setup”. From here select “General”:

On the next screen you will see “Host Address Backend Setup”, press <enter> to enter this setup:

To change the settings in this section use the up and down arrows to navigate and press <enter> to set a particular value. Note when changing a value click on “OK” to close the mini dialog, hitting <enter> will just bring up a virtual keyboard.
For “Local Settings” right click and set as the following for NZ:
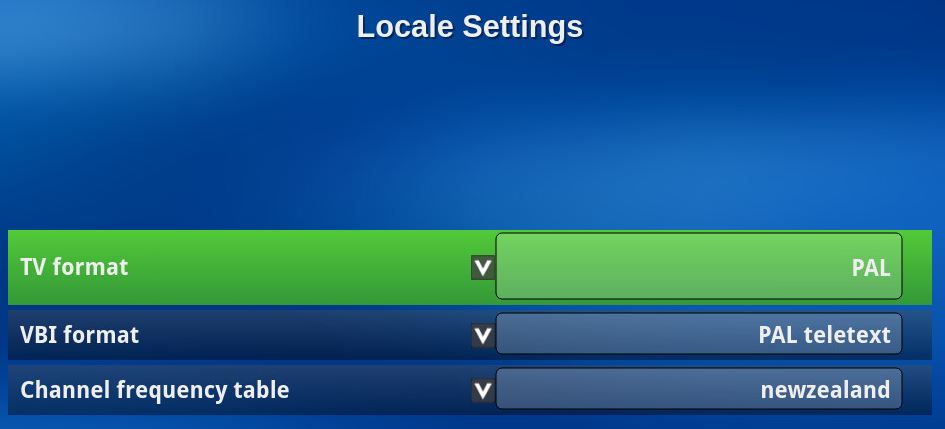
Exit the Locale Setting by pressing the left arrow and then select the “Host Address Backend Setup” the defaults should be fine except for the the security pin and “Primary IP address / DNS name”. The pin needs to be set for when we use Kodi later:
Security PIN = 0000
The Primary IP Address should be set to the static IP for the server:
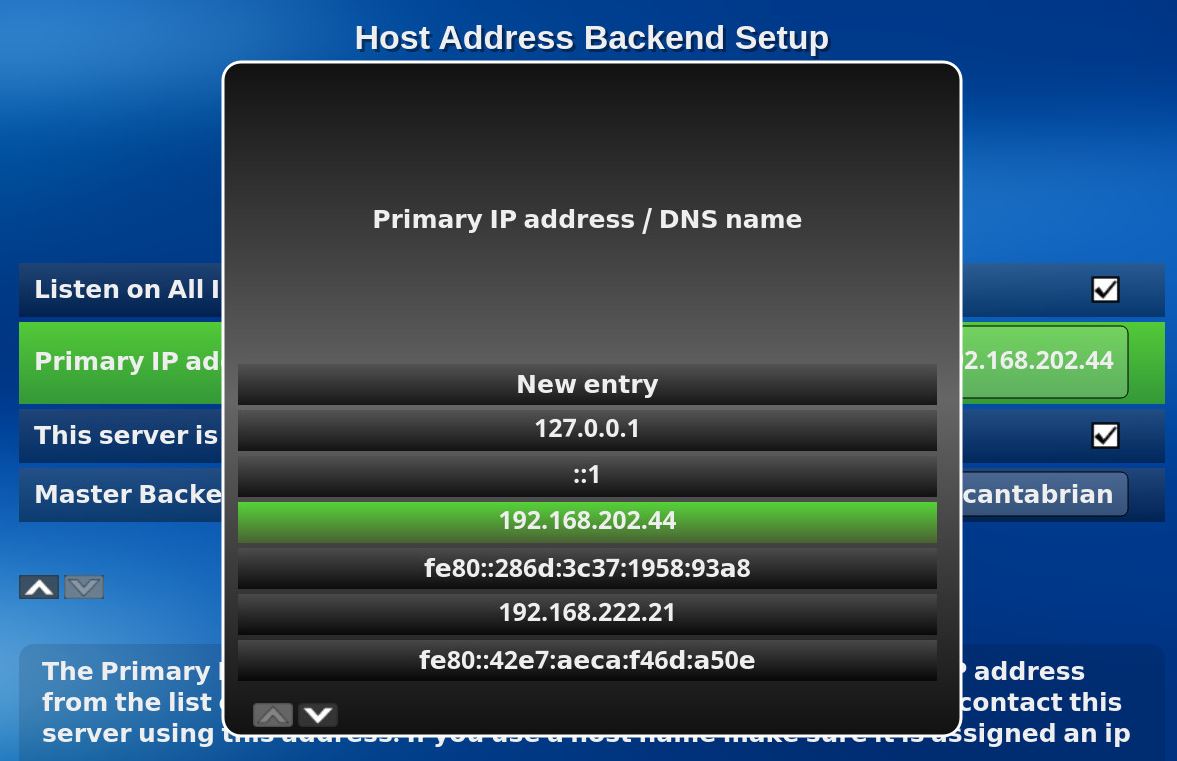
You should ensure that “This is the Master Backend” is selected which means the “Master Backend Name” should be the name of this server. So for me it looked like:

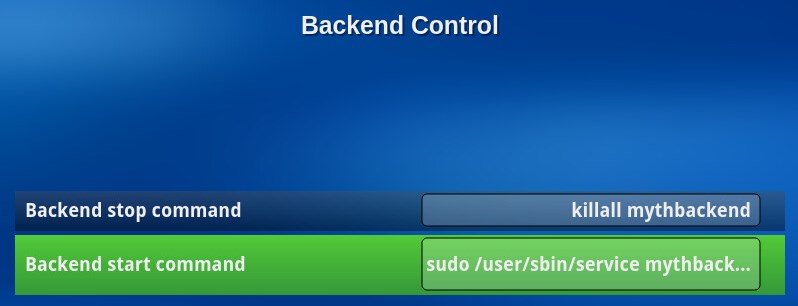
When finished press <esc> or left arrow to exit, This will take you back to the “General” menu. Scroll down till you find “Backend Control” select this and press the right arrow to enter the menu.
Because we are running mythbackend as a CentOS service we need to change the “Backend start command” to “sudo /usr/sbin/service mythbackend start”:
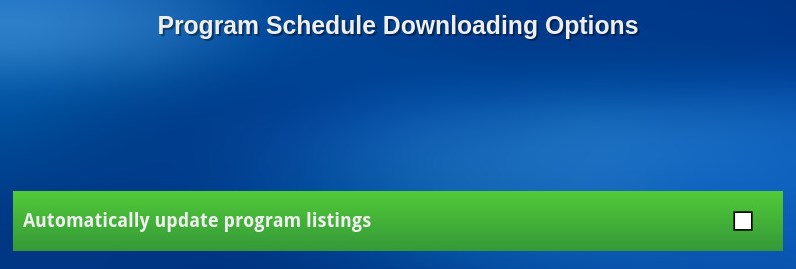
Next go back to the “General” menu and select”Program Schedule Downloading Options” and press the right arrow to move to it’s menu:

Press <space> to toggle “Automatically update program listings” so it is unset:
While in the “General” menu scroll down and find “Job Queue (Backend-Specific)” and press the right arrow to get to the sub menu:

For me I don’t want metadata lookup, commercial detection or transcoding so I deselect “Allow metadata lookup jobs”, “Allow commercial-detection jobs” and “Allow transcoding jobs”:
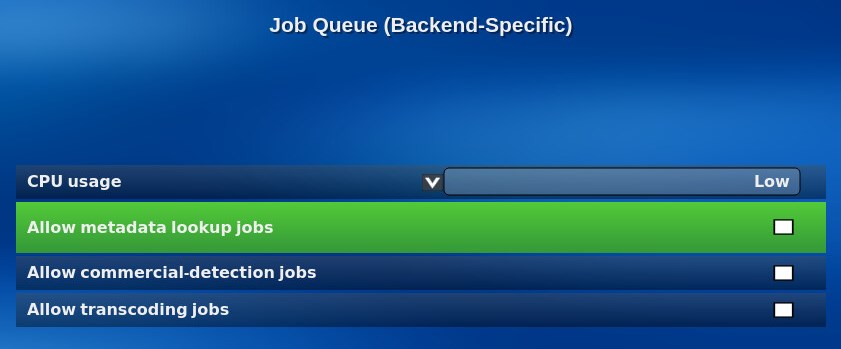
Exit this submenu using the left arrow – you will be prompted to “Save then Exit”. Then press the left arrow twice to get out of the “General” menu – you will be prompted to save, click on “Save then Exit”.
Capture Cards
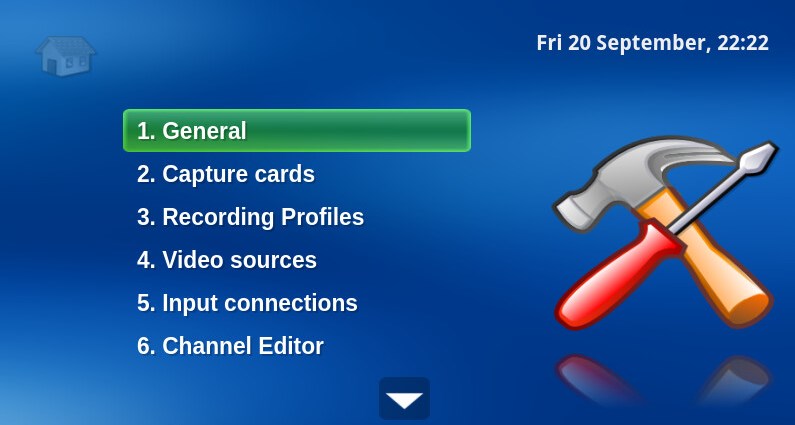
As mentioned I am using HDHomeRuns so select “Capture cards”:
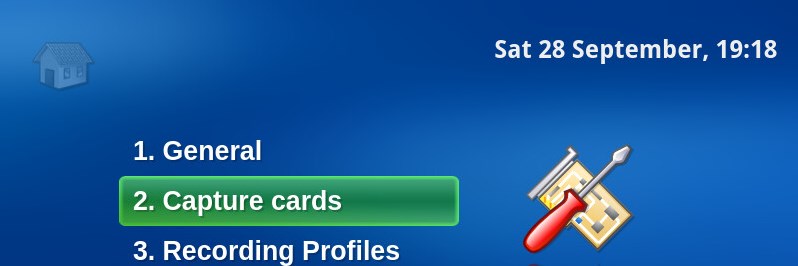
The next screen should look like:
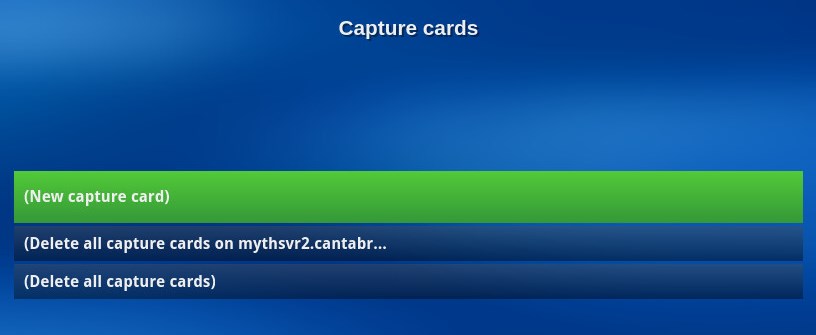
If you see anything other than the three entries above, “(New capture card)”/”(Delete all capture cards on server.domain…”/”(Delete all capture cards)”, then we need to clean the slate by selecting “{Delete all capture cards)” and pressing <Enter> – so the same for “(Delete all capture cards on …”.
Note to delete a capture card, select it and press “D” then
Now click on “New capture card” and wait – be careful it will not popup or take you to another screen. It will instead create another entry at the bottom of the list called “New capture card” – but it will take a few seconds to do this, so don’t click enter again otherwise you will get multiple “New capture card”:
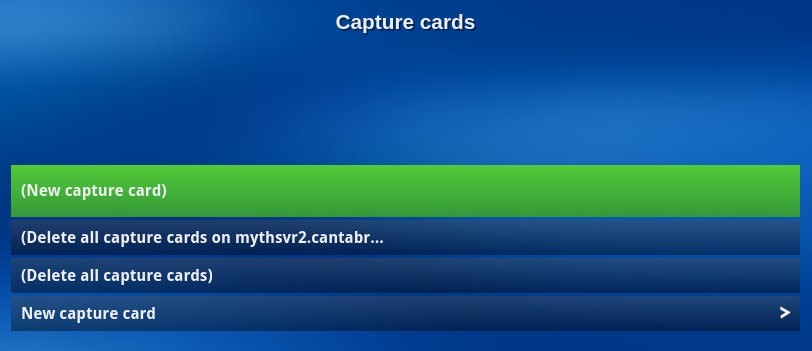
If you have more than one “New capture card” at the bottom press “D” to delete all but one of them – it does seem a little buggy. Select the “New capture card”, the one at the bottom of the list and press <Enter>.
This will take you to the “New capture card” screen with “Card type”. Press enter, or click on “Card type” to select “HDHomeRun networked tuner”:
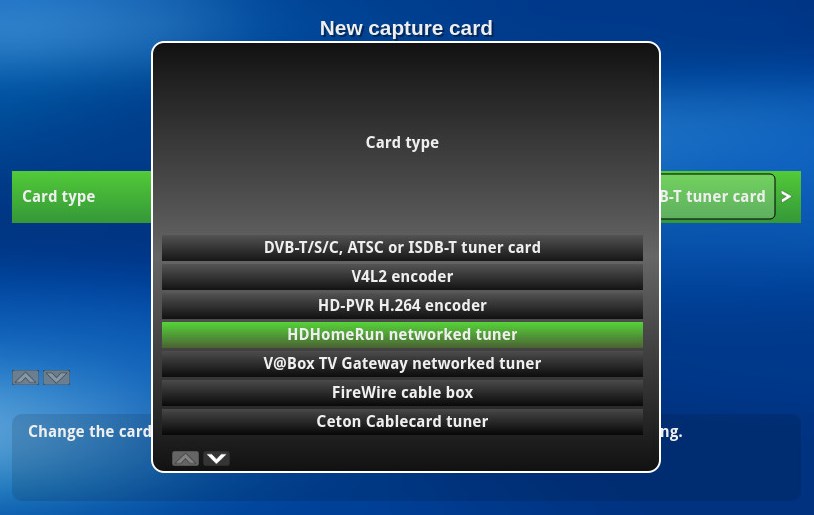
Once you have selected it you should see:

Press the right arrow to get to the settings for it:
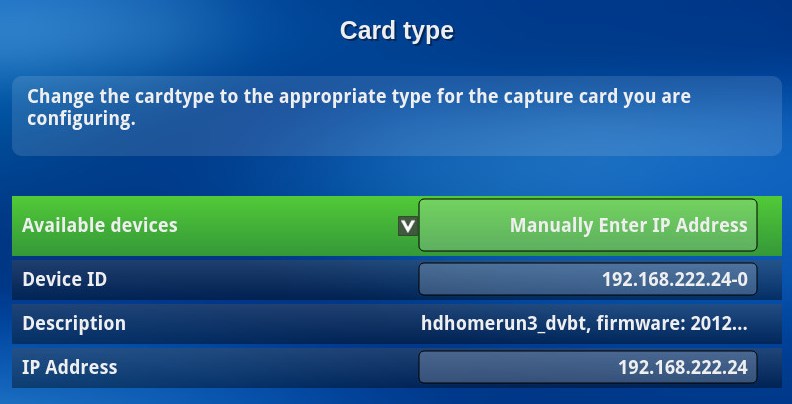
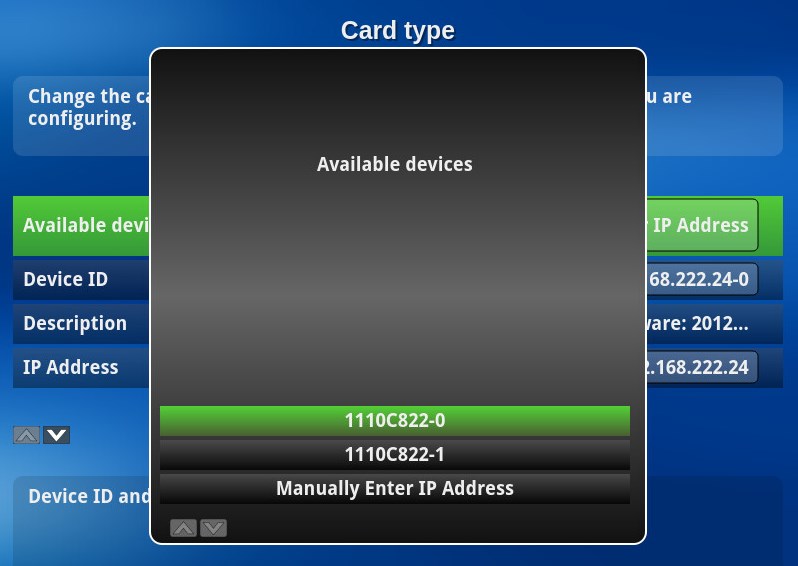
So you can see it found your HDHomeRun but these devices have two tuners so select “Available devices”, as above and press <Enter> to select one tuner, as below, then press <Enter> to save your selection:
Your card selection setup should look like:

Its not visible, but there is another option further down called “Recording Options”. Use the down arrow to move do the list until you see “Recording Options”, select it and press the right arrow to move to that menu:
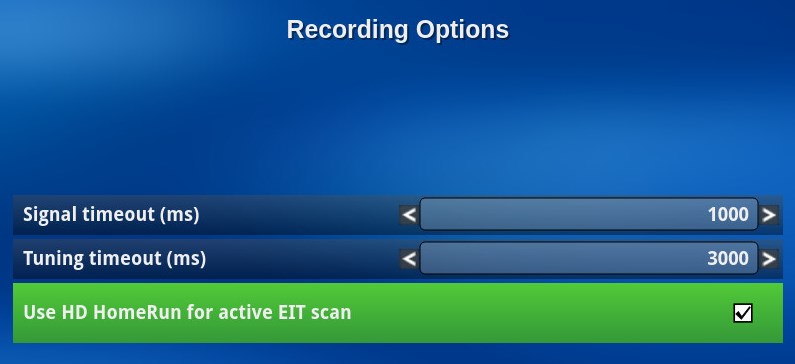
We want “Use HD HomeRun for active EIT scan” to be selected as above.
Now press the left arrow, on the keyboard, to move back a menu. Do this 3 times in total to get back to the “Capture cards” menu.
It is advised you go back one more step and exit the Capture cards menu each time you add an HDHomeRun. You should not have to do this but my experience suggests it is good practice and I have read others say the same thing. So exit the Capture card menu.
Repeat this sequence to add the second tuner, each tuner is configured as a separate card – but this time select the other tuner in your HDHomeRun.
Once you have configured both tuners and are back at the “Capture cards” menu either press <Esc> or the left arrow and you will be prompted to “Save then Exit”. Select this and press enter to get back to the main menu.
Recording Profiles
For HDHomeRun tuners a recording profile is automatically added. So you can accept the defaults to “Recording Profiles” and just move to the next option “Video sources”
Video sources
From the main setup menu select “Video sources” and press <Enter> to configure. From the “Video sources” menu select “(New video source)” and press <Enter> to create one. Once this has been created select it and press the right arrow to configure it:

In the “New video source” menu select “Video source name”, press <Enter> and give it a name like “HDHomeRun video source” and click on OK.

Then select “Listings grabber” and press <Enter> to see the options. Select “Transmitted guide only (EIT)” and press <Enter> to select.

Select “Channel frequence table” and press <Enter> and select “newzealand”:
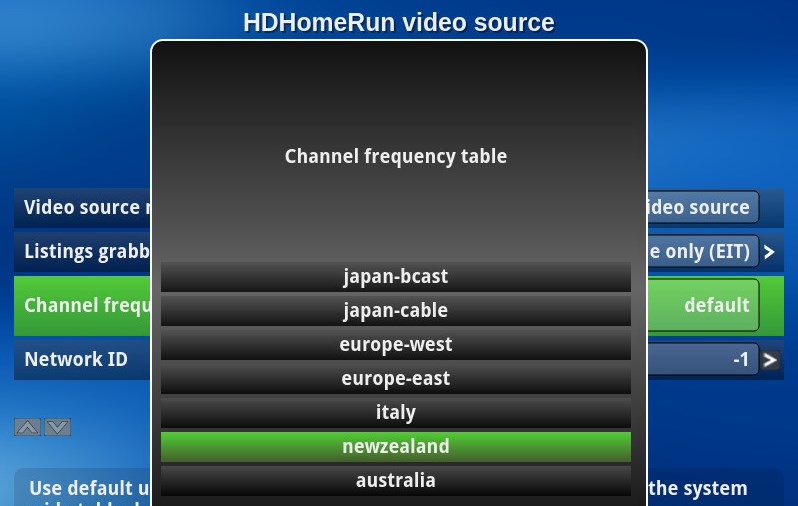
This is now setup so press the left arrow to exit back to the “Video sources” menu. On the “Video sources” menu again press the left arrow or <Esc>, and you will be prompted to “Save then Exit” select this and return to the main menu.
Input connections
From the main menu select “Input connectors”. Select this and press enter. This will show you the current two tuner cards but they won’t be connected to anything:
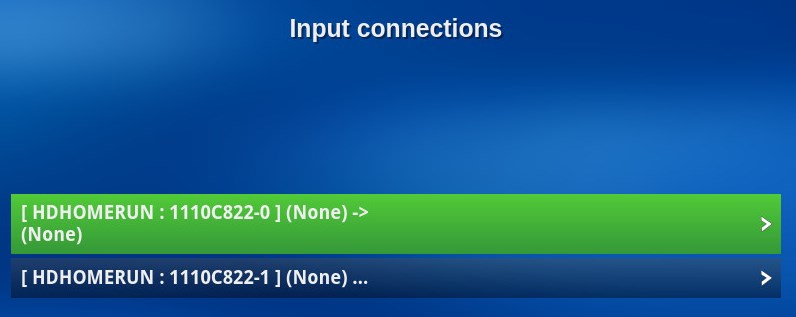
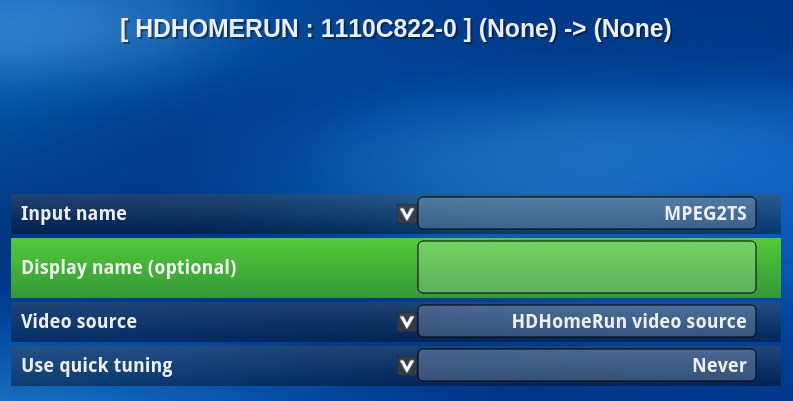
Select the first HDHOMERUN option and press the right arrow to configure. First select “Input name” and select “MPEG2TS”. Next scroll down and select “Video source” and select “HDHomeRun video source” – the one you named earlier. You should now see:
Scroll down and select “Scan for channels” and press the <Enter> to go to that menu.
Select “Scan Type” and ensure “Full Scan” is selected:

Now press the right arrow to get the submenu options for Scan Type. Ensure the “Country” setting is correct. I had a problem with this initially where it didn’t default to the right country but when I reset the DB it came with the right country, so not sure what happened but you should double check. In my case the first time it defaulted to Australia and this meant it didn’t scan all the correct channels. So for me it should look like:

Once again press the left arrow and you are ready to go. Scrolled down to the bottom and selected “Scan”:

Having selected “Scan” press <Enter> to begin the scan. This will start the scan:
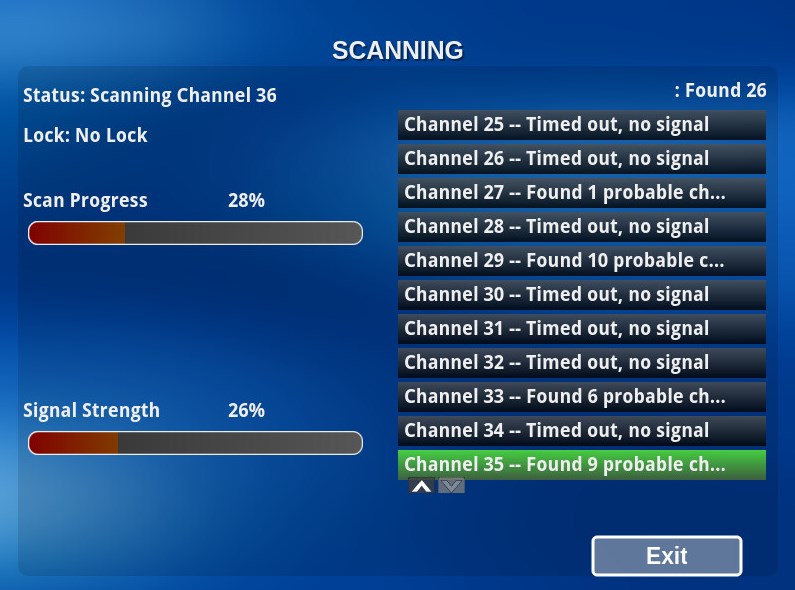
When complete it will ask to “Insert all”/”Insert manually”/”Ignore all”. Select “Insert all” unless you want to modify the channels, it doesn’t give you the option to skip channels, as far as I can see, unfortunately. Click on “Exit” to exit the scan.
Then press the left arrow to exit the scanning menu. You will be prompted to save, select “Save then Exit”. Then again press the left arrow to get back to the Input connections menu.
Select the second tuner and do the same thing – except you don’t need to do a scan this time.
On the tuner menu scroll down till you see “Starting channel” and set it to “1” assuming you are planning on retaining channel 1:
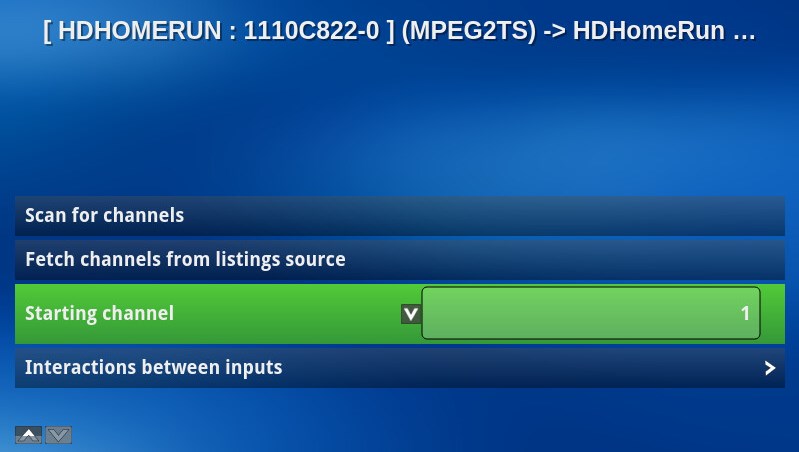
When finished exit the “Input connections” menu by pressing the left arrow and selecting “Save then Exit”.
Channel Editor
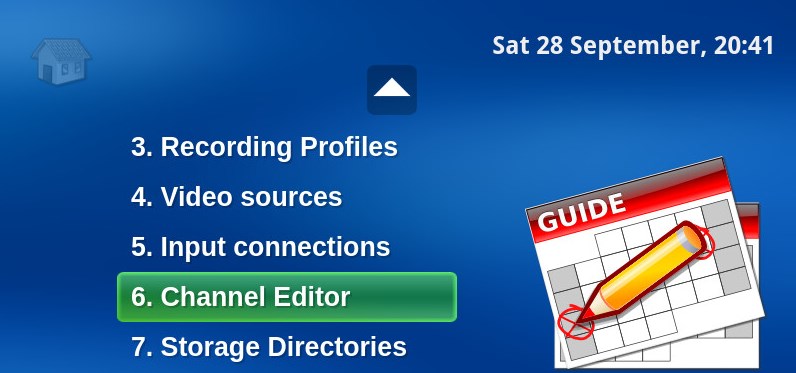
Select “Channel Editor” from the main menu:
This will give you the list of channels. Scroll down the list, if you want to remove a channel, select the channel and press “D” to delete a channel. To edit a channel, potentially changing the channel number, which effects the order they are displayed, press <Enter>
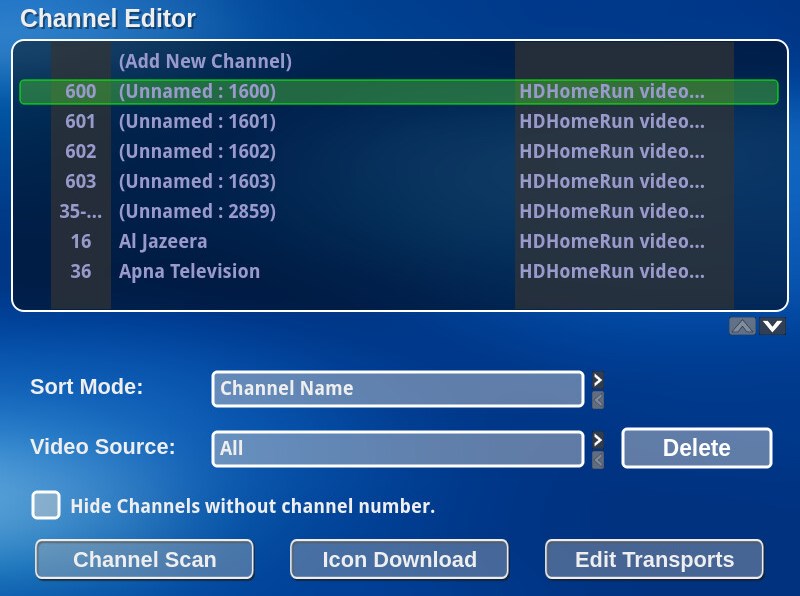
Use this as an opportunity to clean things up.There are a lot of channels I never watch and want to delete, this is the time to do it. You can select a channel and press “D” to delete it.
When finished press <Esc> to exit – there is no prompt to save.
Storage Directories
Select this from the main menu and press <Enter>:
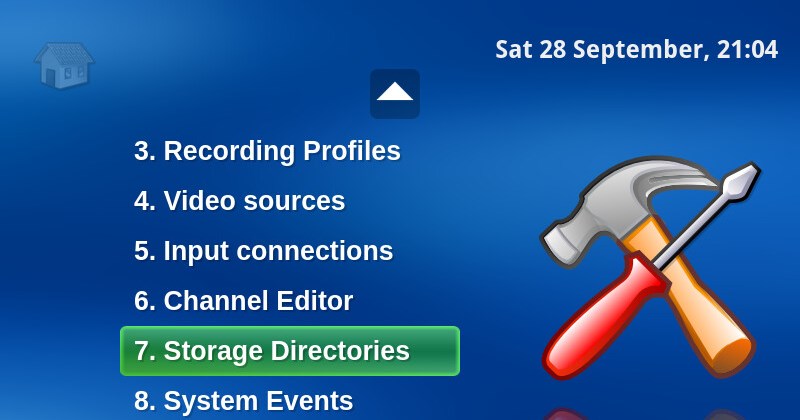
The storage directories allow you to put different things in different storage locations. I don’t really do this, I just have two “default” storage locations which we setup earlier:
/srv/mythtv/nas1
/srv/mythtv/nas2
From the menu select “Default” and press the right arrow to edit the default storage locations. Click on “(Add New Directory)”:

Find the first folder and then click “OK”
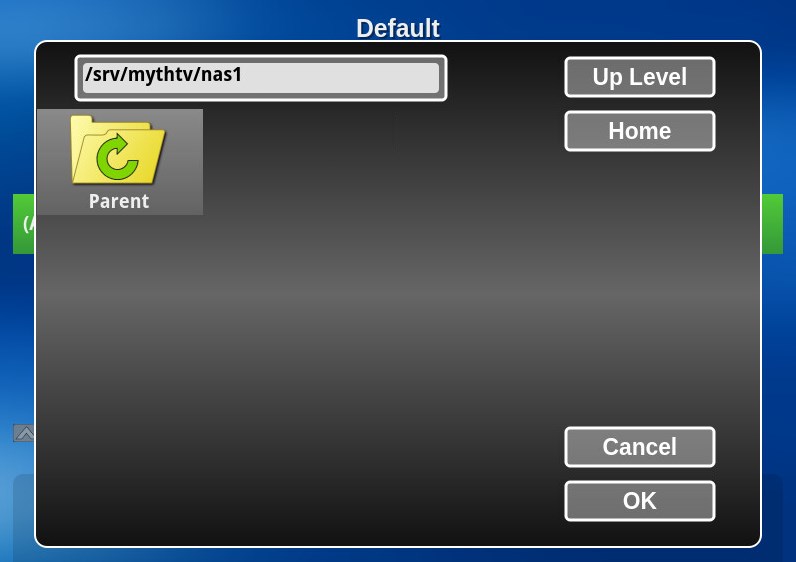
Repeat the exercise by clicking on “(Add New Directory)” again. This should give you:

Note I have added the subfolder “recorded” on the share. So the “recorded” folder is created externally but only appears at this point.
You should now repeat this for all the storage groups. This is as much for completeness and just incase we use them later and we don’t want them filling up the VM but rather use the NAS. So ensure the subfolders have been created on the NAS and then repeat for the following:
banners
coverart
dbbackups
fanart
livetv
music
musicart
photographs
screenshots
trailers
videos
Once done press <Esc> or <left arrow> to exit – once again you will be prompted to save so click on “Save then Exit”.
You are now back at the main setup menu, press <Esc> to exit.
Double check “Primary IP address”
I have some problems with getting live TV to work with Kodi and found I need to set the “Primary IP address” correctly.
Login to the MythTV setup again and go into “General” and then select “Host Address Backend Setup” and press the right arrow. From the “Host Address Backend Setup” scroll down to “Primary IP address / DNS name” and select it:

Ensure you select the IPv4 address:

Back out of this as you have done previously saving as you go.
Start mythbackend
As root run the following:
systemctl start mythbackend.service
Then to see if it is working run:
systemctl status mythbackend.service
This should return:
● mythbackend.service - MythTV backend service
Loaded: loaded (/usr/lib/systemd/system/mythbackend.service; enabled; vendor preset: disabled)
Active: active (running) since Sat 2019-09-28 21:49:34 NZST; 7s ago
Main PID: 11262 (mythbackend)
Tasks: 14
CGroup: /system.slice/mythbackend.service
└─11262 /usr/bin/mythbackend --logpath /var/log/mythtv

Sep 28 21:49:36 mythsvr2.cantabrian mythbackend[11262]: 2019-09-28 21:49:36.153367 I Starting HouseKeeper.
Sep 28 21:49:36 mythsvr2.cantabrian mythbackend[11262]: 2019-09-28 21:49:36.213006 I Listening on TCP 0.0.0.0:6544
Sep 28 21:49:36 mythsvr2.cantabrian mythbackend[11262]: 2019-09-28 21:49:36.213841 I Listening on TCP [::]:6544
Sep 28 21:49:36 mythsvr2.cantabrian mythbackend[11262]: 2019-09-28 21:49:36.213947 I Listening on TCP 0.0.0.0:6554
Sep 28 21:49:36 mythsvr2.cantabrian mythbackend[11262]: 2019-09-28 21:49:36.214031 I Listening on TCP [::]:6554
Sep 28 21:49:36 mythsvr2.cantabrian mythbackend[11262]: 2019-09-28 21:49:36.214237 I Listening on TCP 0.0.0.0:6549
Sep 28 21:49:36 mythsvr2.cantabrian mythbackend[11262]: 2019-09-28 21:49:36.214331 I Listening on TCP [::]:6549
Sep 28 21:49:39 mythsvr2.cantabrian mythbackend[11262]: 2019-09-28 21:49:39.155273 I Reschedule requested for MATCH 0 0 0 - SchedulerInit
Sep 28 21:49:39 mythsvr2.cantabrian mythbackend[11262]: 2019-09-28 21:49:39.189627 I Scheduled 0 items in 0.0 = 0.01 match + 0.00 check + 0.01 place
Sep 28 21:49:39 mythsvr2.cantabrian mythbackend[11262]: 2019-09-28 21:49:39.190537 I Scheduler: Seem to be woken up by USER
Run Myth Frontend
One of the big advantages of running in a VM is that you get a GUI. So we can actually run the frontend on the server/VM and it gives us a really quick and easy way to check it’s all working. So run “mythTV frontend”, but make sure you do it as the mythtv user:
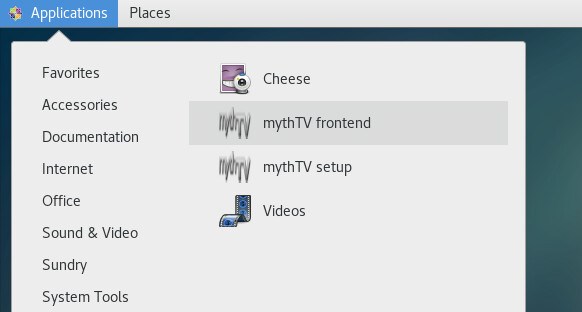
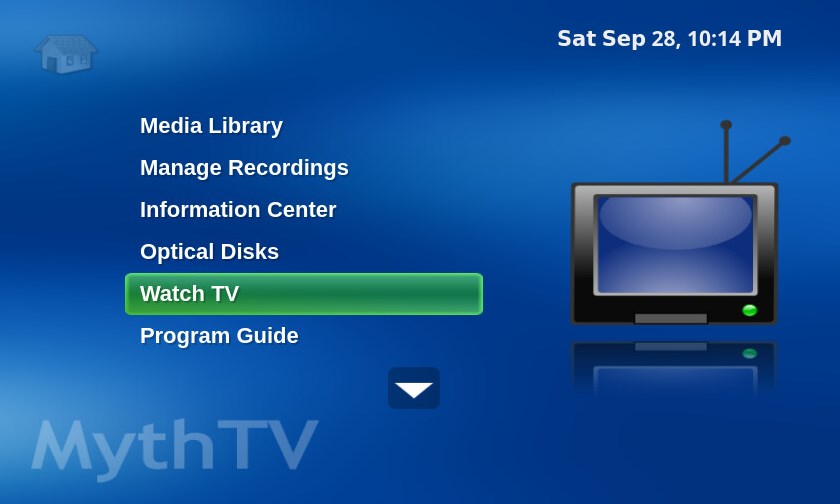
Note it will take a little while to start, maybe 10 or 20 seconds. Then select “Watch TV”
Because you are running in a VM remotely it won’t do audio – at least not for me on ESXi 6.5:
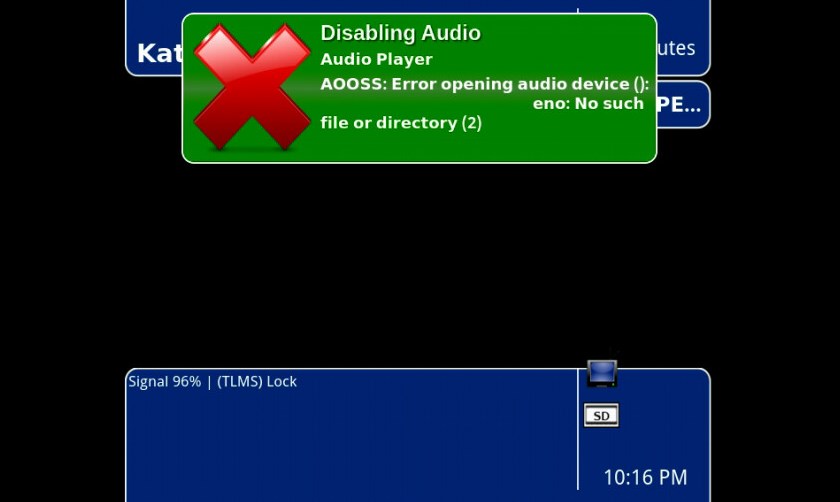
To exit the live TV press <Esc>, but remember it may take a few seconds to exit – so be VERY patient. It might also lock up, because I think it is probably pushing it to do the front end on a VM.
To illustrate the quality you should see I put together a short video:
II have to say it was pretty impressive all around, MythTV, CentOS and VMware. This VM is running on ESXi 6.0 on an old Lenovo small form factor, SFF, 7479CTO , which had a Intel(R) Core(TM)2 Duo CPU E8400 @ 3.00GHz with 8GB of RAM. The Lenovo is 9 years old and was made on 11th Dec 2010. I connected to this VM from my desktop which is where the recording was made using the “VMware Remote Console”
Setting up MythWeb
Copy the mythweb.conf
cp /etc/httpd/conf.d/mythweb.conf /opt/rh/httpd24/root/etc/httpd/conf.d
Now edit the copied version:
nano /opt/rh/httpd24/root/etc/httpd/conf.d/mythweb.conf
Search for “setenv db_password” and set the password. Then save the file. It should look like:
setenv db_password “<my secret password>”
Now we need to fix recorded.php. There are multiple copies of this file so be careful to edit the one below
cd /usr/share/mythweb/modules/tv
cp recorded.php recorded.php.ootb
nano recorded.php
Look for a section that looks like:
// How much free disk space on the backend machine?
list($size, $used) = MythBackend::find()->sendCommand('QUERY_FREE_SPACE_SUMMARY');
if (function_exists('gmp_mul')) {
// GMP functions should work better with 64 bit numbers.
$size = gmp_mul('1024', $size);
define(disk_size, gmp_strval($size));
$size = gmp_mul('1024', $used);
define(disk_used, gmp_strval($size));
}
else {
// This is inaccurate, but it's the best we can get without GMP.
define(disk_size, ($size * 1024));
define(disk_used, ($used * 1024));
}
You need to change disk_size to ‘disk_size’ and disk_used to ‘disk_used’ in TWO places. The result should look like:
// How much free disk space on the backend machine?
list($size, $used) = MythBackend::find()->sendCommand('QUERY_FREE_SPACE_SUMMARY');
if (function_exists('gmp_mul')) {
// GMP functions should work better with 64 bit numbers.
$size = gmp_mul('1024', $size);
define('disk_size', gmp_strval($size));
$size = gmp_mul('1024', $used);
define('disk_used', gmp_strval($size));
}
else {
// This is inaccurate, but it's the best we can get without GMP.
define('disk_size', ($size * 1024));
define('disk_used', ($used * 1024));
}
Edit: /usr/share/mythtv/backend-config/config_backend_general.xml
There are two properties defined in the file “BackendServerIP” and “MasterServerIP”. For each property you define a IPv4 and IPv6 address. I only set the IPv4 ones to match the IP of the server and left the IPv6 ones as “::1”.
Restart Apache:
service httpd24-httpd restart
Note the apache logs are in:
/var/log/httpd24
Blank page for mythweb
If you get a blank page, as I obviously did have a look at the apache logs:
tail -f /var/log/httpd24/error_log
In this case I saw:
[Tue Nov 26 19:58:49.319800 2019] [php7:warn] [pid 7880] [client fe80::b40f:b295:7864:d089:55240] PHP Warning: Unknown: function '0' not found or invalid function name in Unknown on line 0
[Tue Nov 26 19:58:49.333297 2019] [php7:error] [pid 7880] [client fe80::b40f:b295:7864:d089:55240] PHP Fatal error: Uncaught Error: Class 'MythBackend' not found in /usr/share/mythweb/includes/utils.php:56\nStack trace:\n#0 /usr/share/mythweb/includes/db_update.php(57): setting('recommend_enabl...', NULL, false)\n#1 /usr/share/mythweb/includes/init.php(46): require_once('/usr/share/myth...')\n#2 /usr/share/mythweb/mythweb.php(20): require_once('/usr/share/myth...')\n#3 {main}\n thrown in /usr/share/mythweb/includes/utils.php on line 56
For me this was because when I did the cleanup I deleted everything under:
/usr/share/mythtv
Unfortunately that is where “php-MythTV” was installed so I needed to erase, reinstall followed by restarting apache:
yum erase php-MythTV
yum install php-MythTV
service httpd24-httpd restart
Problems with backend status
If you have problems with the backend status you might want to look at:
Download failed.: cURL error 2:
and/or
Backups
Obviously it is very important to have backups. The process I follow is that I backup folders, DBs or whatever on the local machine and then I have a scheduled job on my Open Media Vault, OMV, NAS server which picks them up. This works out better since some of the machines are in the DMZ.
So, on this MythTV server run:
mkdir -p /srv/backup/smb
mkdir -p /srv/backup/mysql
mkdir -p /srv/backup/scripts
chown -R mythtv.mythtv /srv/backup
chmod -R 777 /srv/backup
Then copy you backup scripts to “/srv/backup/scripts”. I have uploaded my current scripts zoyinc_mythtv_backup_scripts_v2 – these are correct as of this moment. You may obviously need to customize these scripts, but they are just examples.
Set the permissions on the scripts:
chmod -R 777 /srv/backup/scripts
I then set them up as a cron job under the root account – potentially you might run it under a different account for security, I am not fussed as this server is on my LAN with only me accessing it. So as the root user run “crontab -e” and add the following entries:
0 2 * * * /srv/backup/scripts/mysql_dumps.sh
5 2 * * * /srv/backup/scripts/daily_backup.sh
These will run the backups a 2:00am and 2:05am each morning.
To copy the backups to my NAS server follow the post Scheduling a task in Open Media Vault. For myself I needed to add an smb user to match my script – reminder to self, create user “backups” on the MythTV host.
Stuff I did trying to get recordings to show
#
# Fix PHP script for MythWeb
#
cd /usr/share/mythweb/modules/tv/
cp recorded.php recorded.php.ootb
nano recorded.php
# There is a section that looks like:
// How much free disk space on the backend machine?
list($size, $used) = MythBackend::find()->sendCommand(‘QUERY_FREE_SPACE_SUMMARY’);
if (function_exists(‘gmp_mul’)) {
// GMP functions should work better with 64 bit numbers.
$size = gmp_mul(‘1024’, $size);
define(disk_size, gmp_strval($size));
$size = gmp_mul(‘1024’, $used);
define(disk_used, gmp_strval($size));
}
else {
// This is inaccurate, but it’s the best we can get without GMP.
define(disk_size, ($size * 1024));
define(disk_used, ($used * 1024));
}
# Need to change disk_size to ‘disk_size’ and disk_used to ‘disk_used’ in TWO places.
# The result should look like:
// How much free disk space on the backend machine?
list($size, $used) = MythBackend::find()->sendCommand(‘QUERY_FREE_SPACE_SUMMARY’);
if (function_exists(‘gmp_mul’)) {
// GMP functions should work better with 64 bit numbers.
$size = gmp_mul(‘1024’, $size);
define(‘disk_size’, gmp_strval($size));
$size = gmp_mul(‘1024’, $used);
define(‘disk_used’, gmp_strval($size));
}
else {
// This is inaccurate, but it’s the best we can get without GMP.
define(‘disk_size’, ($size * 1024));
define(‘disk_used’, ($used * 1024));
}
Edit: /usr/share/mythtv/backend-config/config_backend_general.xml
- Changed BackendServerIP and MasterServerIP to 192.168.202.44
ON the backend setup I set all the General | Locale Settings
Diagnostic and troubleshooting
List the installed php modules run:
php -m
References
HDHomeRun
https://www.silicondust.com/hdhomerun/
MythTV guide 2015
https://www.mythtv.org/wiki/Installing_MythTV_on_RHEL/CentOS
ArchLinux: MythWeb
https://wiki.archlinux.org/index.php/MythWeb




![[L] – WordPress UAM Locked Post](http://www.zoyinc.com/wp-content/uploads/2024/04/WordpressUAMLockedPost_Featured.jpg)
