My Setup
I need to upgrade a number of my VMs from CentOS7 to AlmaLinux 9.5, this post is about creating a base VM that can be cloned for multiple purposes.
At the moment my home lab is on ESXi7, and I will be installing AlmaLinux from the iso:
AlmaLinux-9.5-x86_64-dvd.iso
VM Configuration

Setup
You will need to enable the iso and change the boot device to being the iso image. From the first screen select “Install AlmaLinux 9.5”:

Select the correct local region:

Now you need to define how you want it installed, you should see:

Installation Destination
Click on “Installation Destination” to take you to the following page

Click on the “VMware Virtual Disk” and it will turn blue and then click on it again to put a white tick on it.
Then select “Custom” under “Storage Configuration”.
Then click on “Done” which will take you to “Manual Partitioning” and you will see

Click on the “+” sign to add a partition.
For the first one set it to “/boot” with say 2GB capacity, noting that it seems boot partitions seem to need to be bigger now:

Click on “Add mount point”. You will then need to create a root mount, “/”, and a swap. This should get something like

Again click on “Done” and you may see a warning message in which case you may need to click “Done” a second time. Then you should see a summary:

Click on “Accept Changes” to continue. Now click on “Software Selection”:

Leave it as “Server with GUI” and select the following:
- FTP Server
- File and Storage Server
- Development Tools
- Graphical Administration Tools
- Network File System Client

Again press “Done”. Next click on “Network & Host Name”.
From the “Network & Host Name” screen click on “Configure” to edit the networking settings. Mine looked like

Then click on “Save”. Still on the “Network & Host Name” screen, enter the hostname and click on “Apply”:

Again click on “Done”. Next click on “Root Password”, set a root password and click on “Done”.
You can now begin the install by clicking on “Begin Installation”

When it’s complete you will see:

When you reboot it will take a few minutes and you will get to the “Setup” page. It’s all straight forward stuff, so click on “Start Setup”:

Finally shutdown the VM and disconnect the DVD/ISO so that it doesn’t boot to the install disk.
For myself I reduce the number of workspaces to 1, set under “Multitasking”. Also disable “Screen Blank” under “Power”.
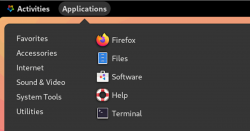
Finally, I would follow the post AlmaLinux GUI – no taskbar or application shortcuts to show Applications, Spaces and the taskbar.
The changes to workspaces, screen blank, taskbar, etc. will need to be done for all users. So for me this was for the root and tony user.


![[L] – WordPress UAM Locked Post](http://www.zoyinc.com/wp-content/uploads/2024/04/WordpressUAMLockedPost_Featured.jpg)